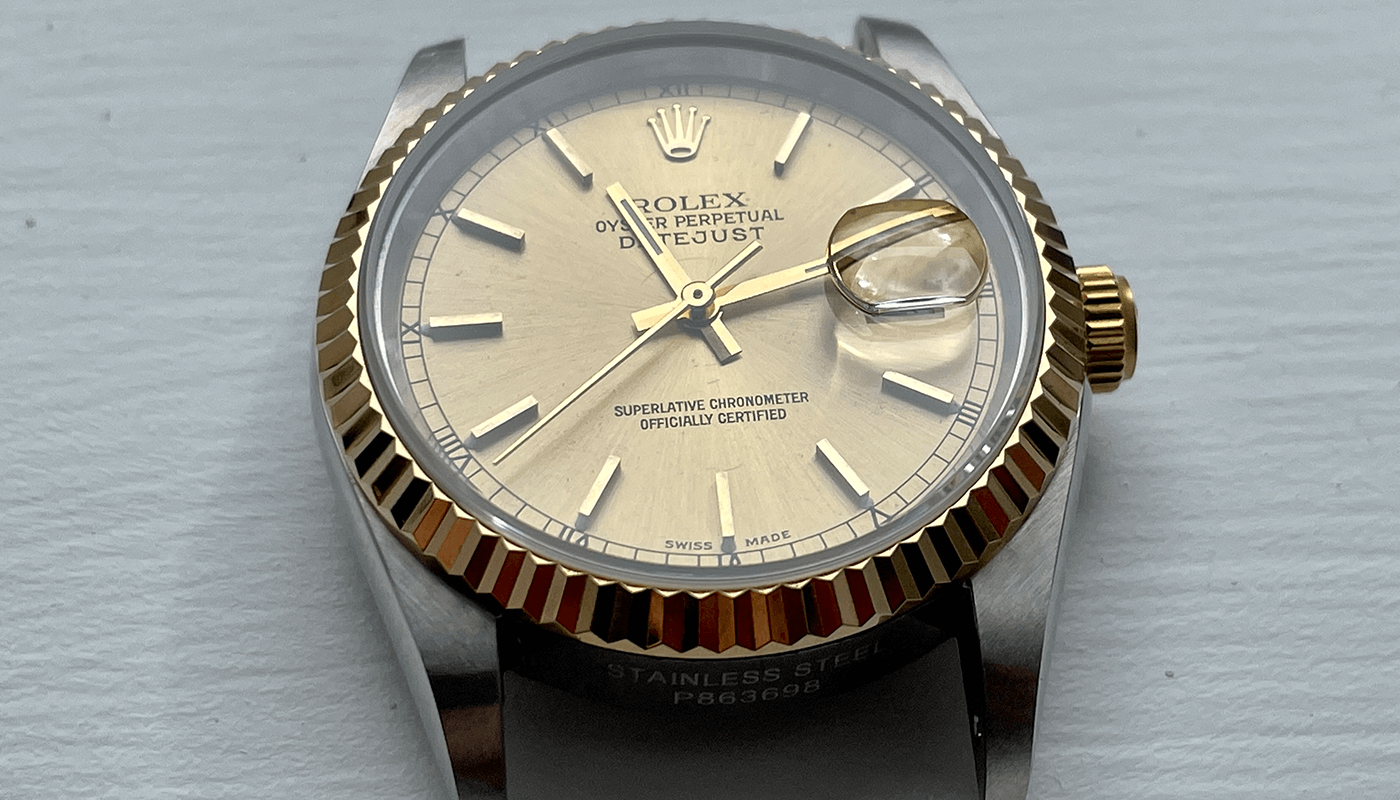
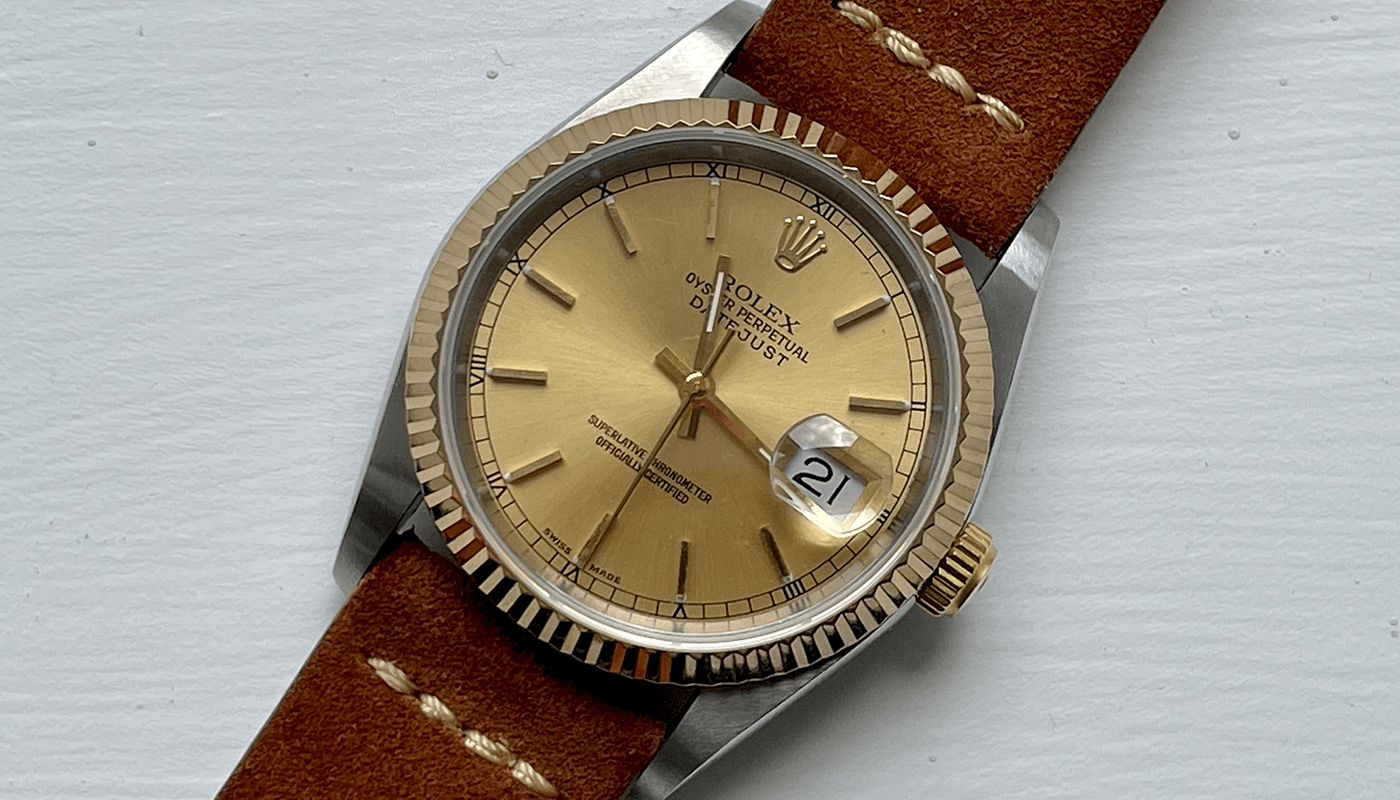
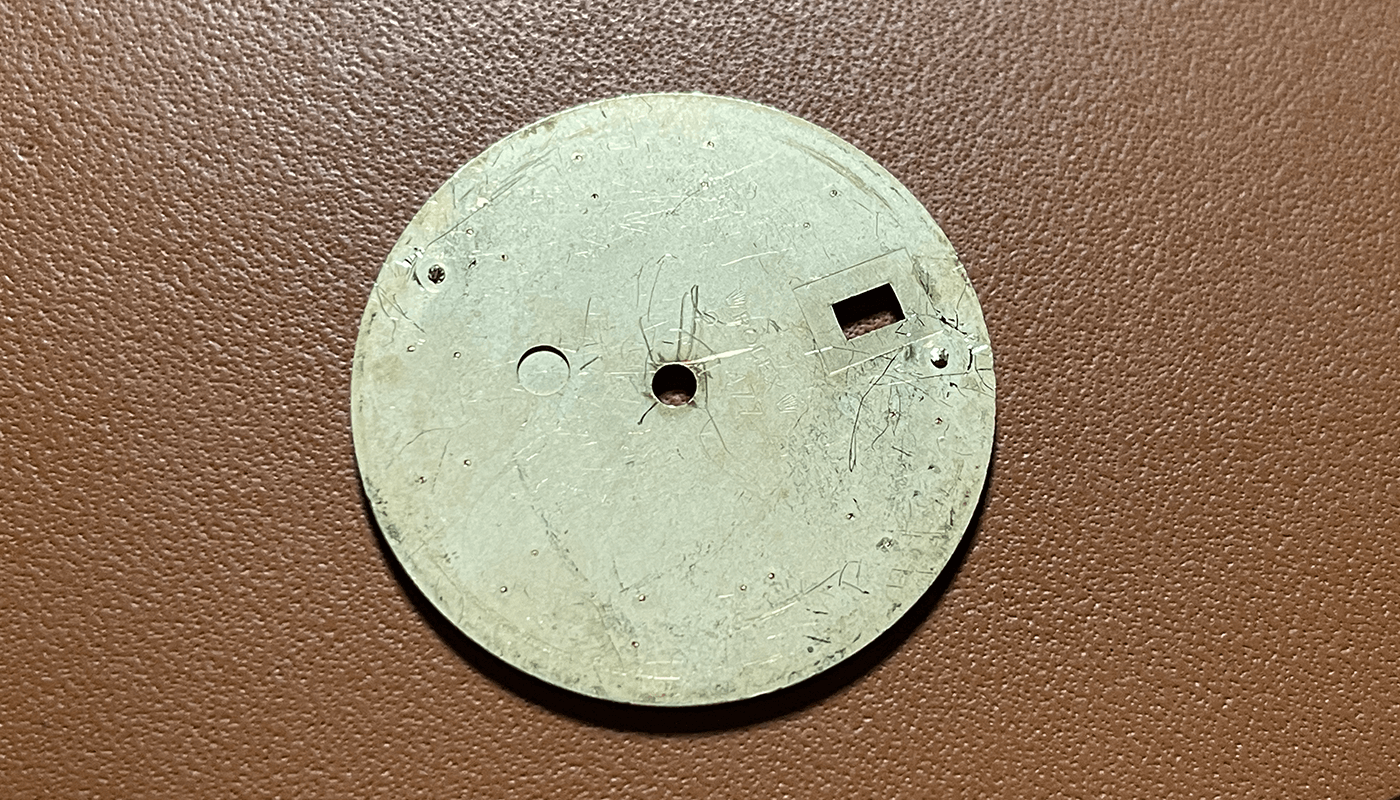
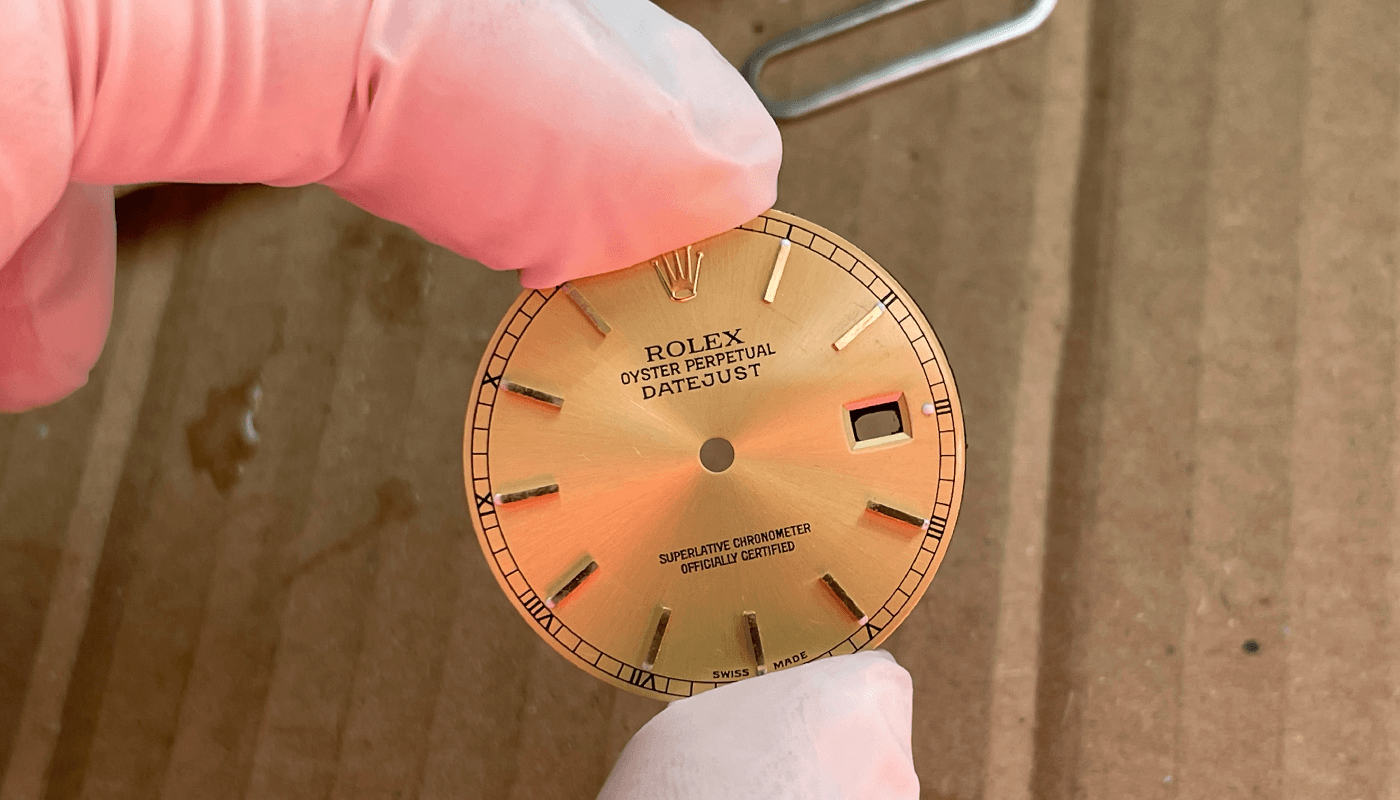
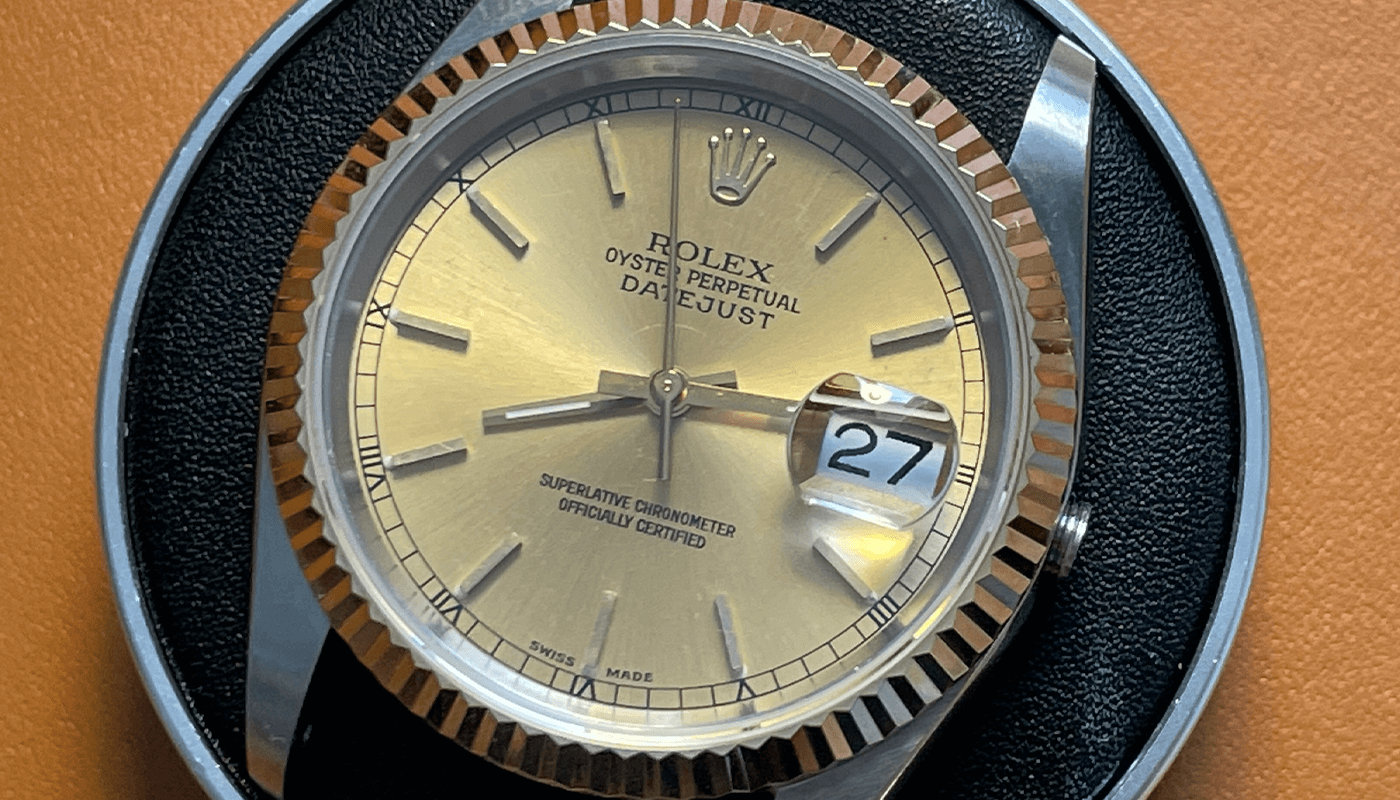
A franken or frankenstein Rolex is known a watch build from using some genuine Rolex parts and then using parts sourced else where. In this build i sourced a genuine 16013 gold champagne dial Rolex dial with stick markers
Sourcing Parts
For this build im going to use a 2836 movement (Seagull ST2100) which has a 8 bps and gives it that real 16013 feel. I also purchased a date wheel overlay with Rolex dial numbers to go with this movement. You can see more info about the 2836 movement here
Get 2836 MovementThe case i used is a two tone case with a gold bezel and silver watch case. It comes with a sapphire crystal and looks stunning for this build. Its sourced from Raffle dials.

The genuine dial was sourced from searching eBay for many days until i could find a good genuine dial. The condition of this dial is not perfect and has a light marks on dial and sticks but it was a far price and a great dial for this build. Below is a link to find similar dials
Get Dial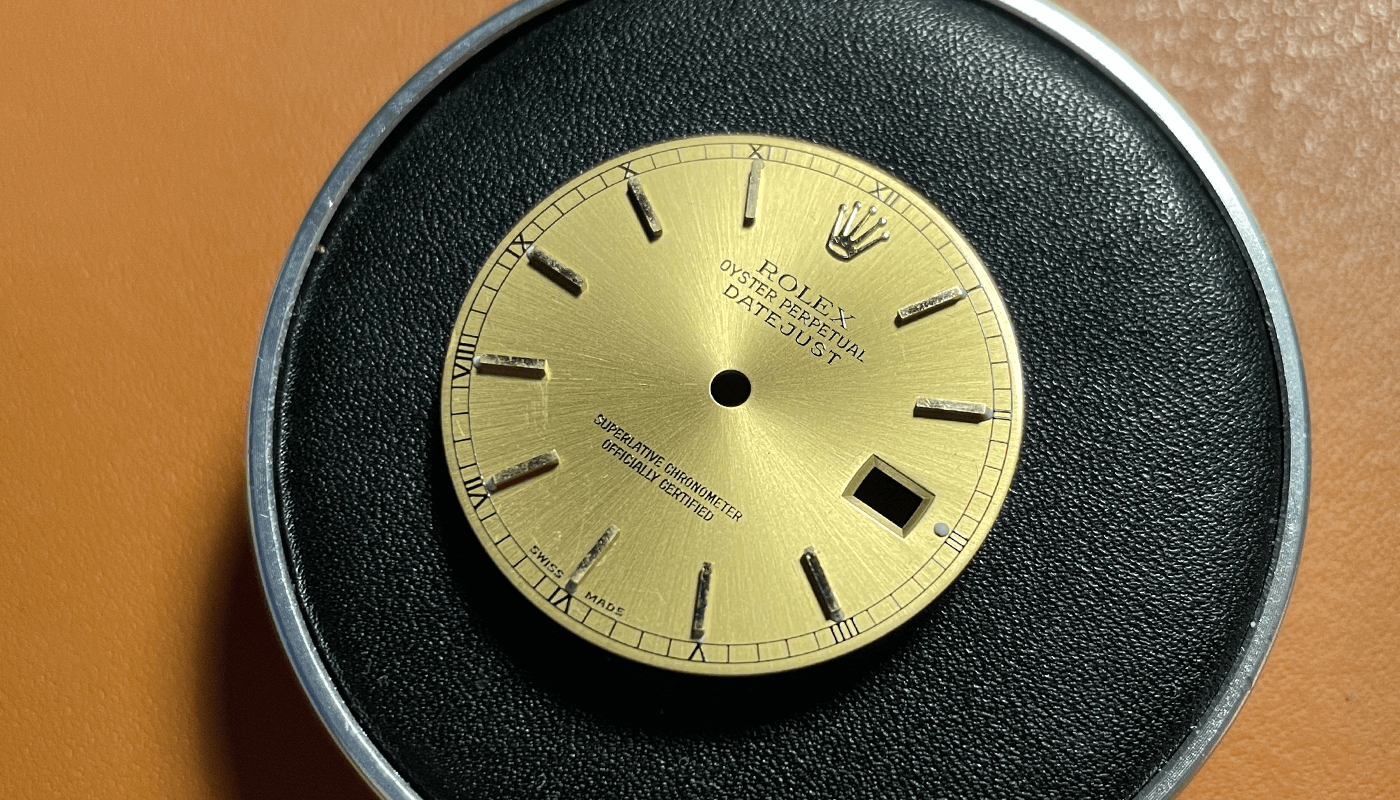

I found great hands on eBay for 2835 movements. I purchased gold hands with lumes so they look good with the dial and on this build.
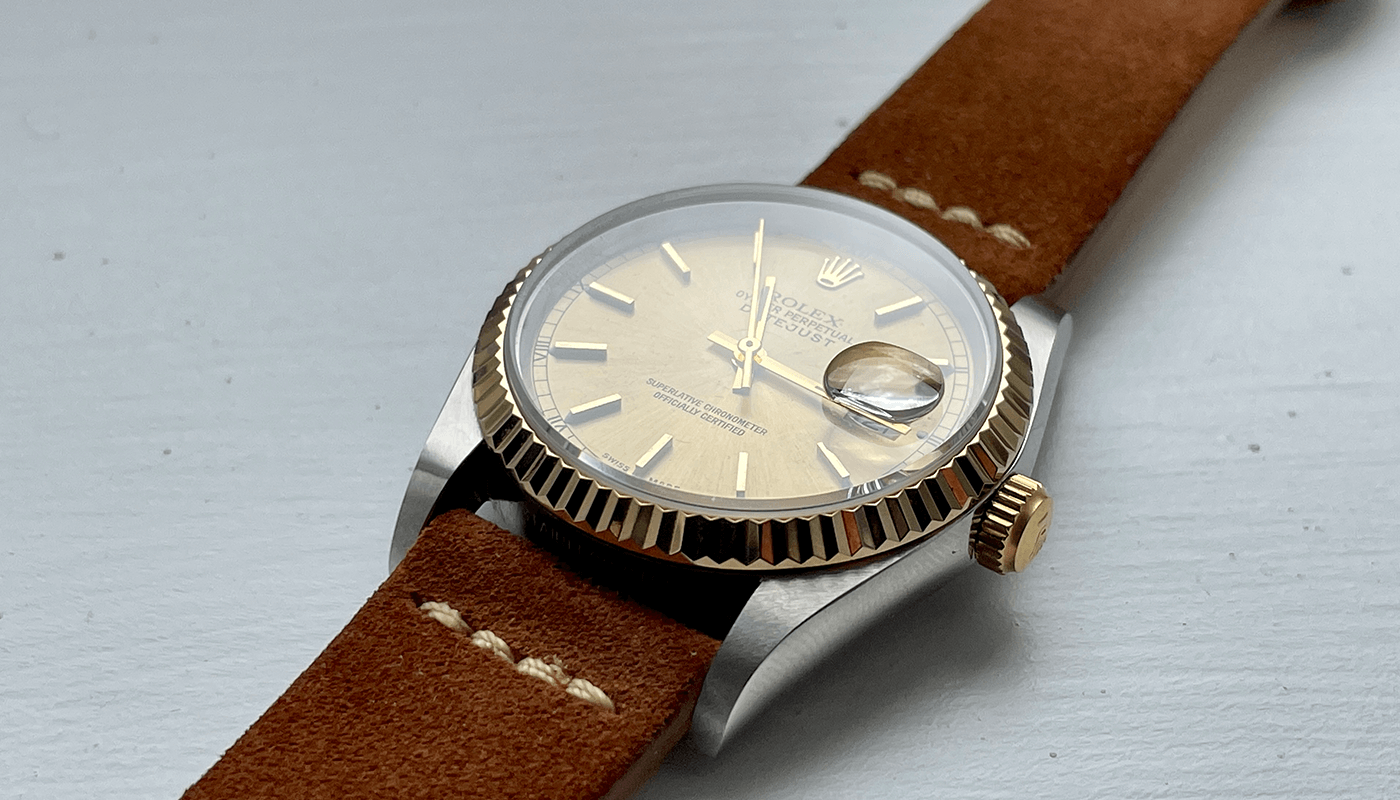
Get HandsI do also have a two tone jubilee bracelet coming with this build however i love a suede strap and i purchased a brown one from eBay for this build.
Get the StrapPrepare the Dial
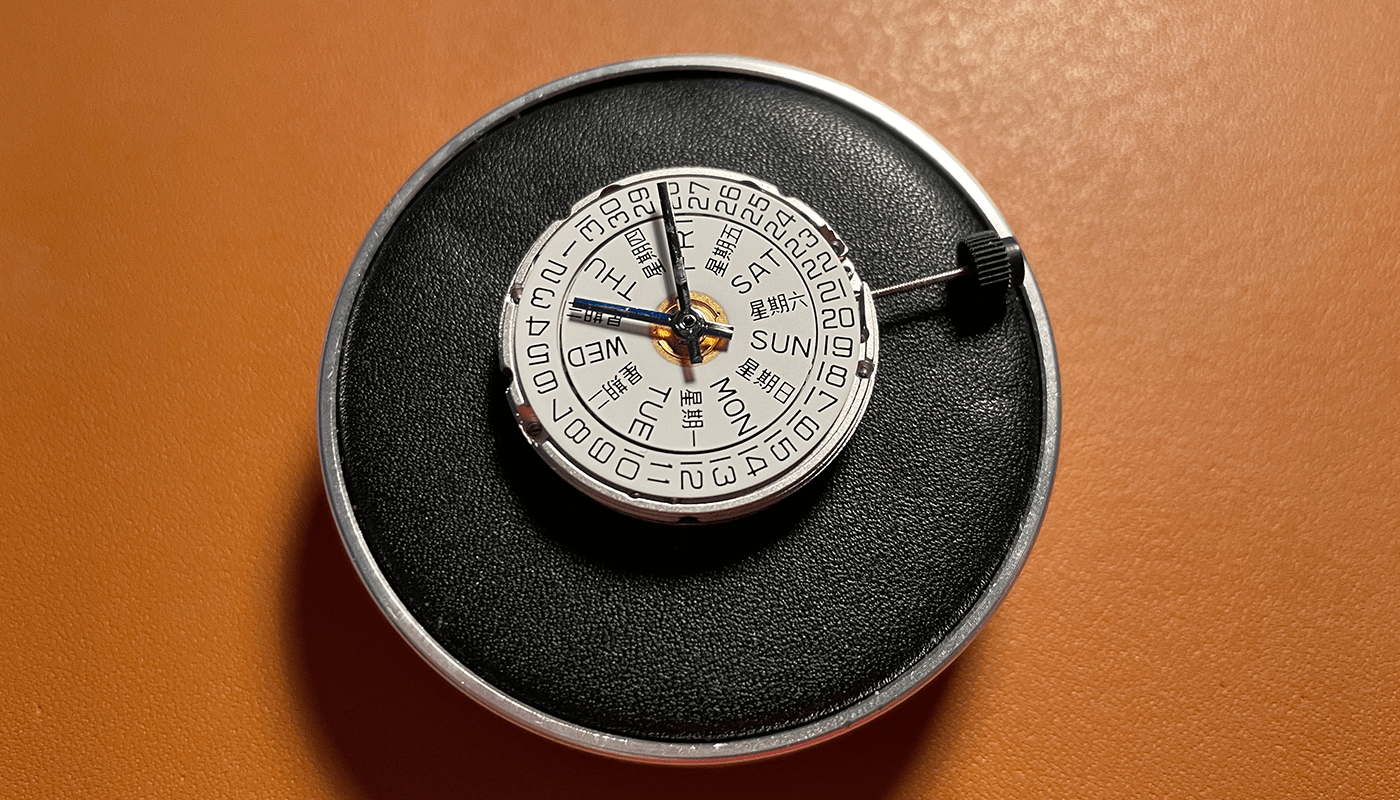
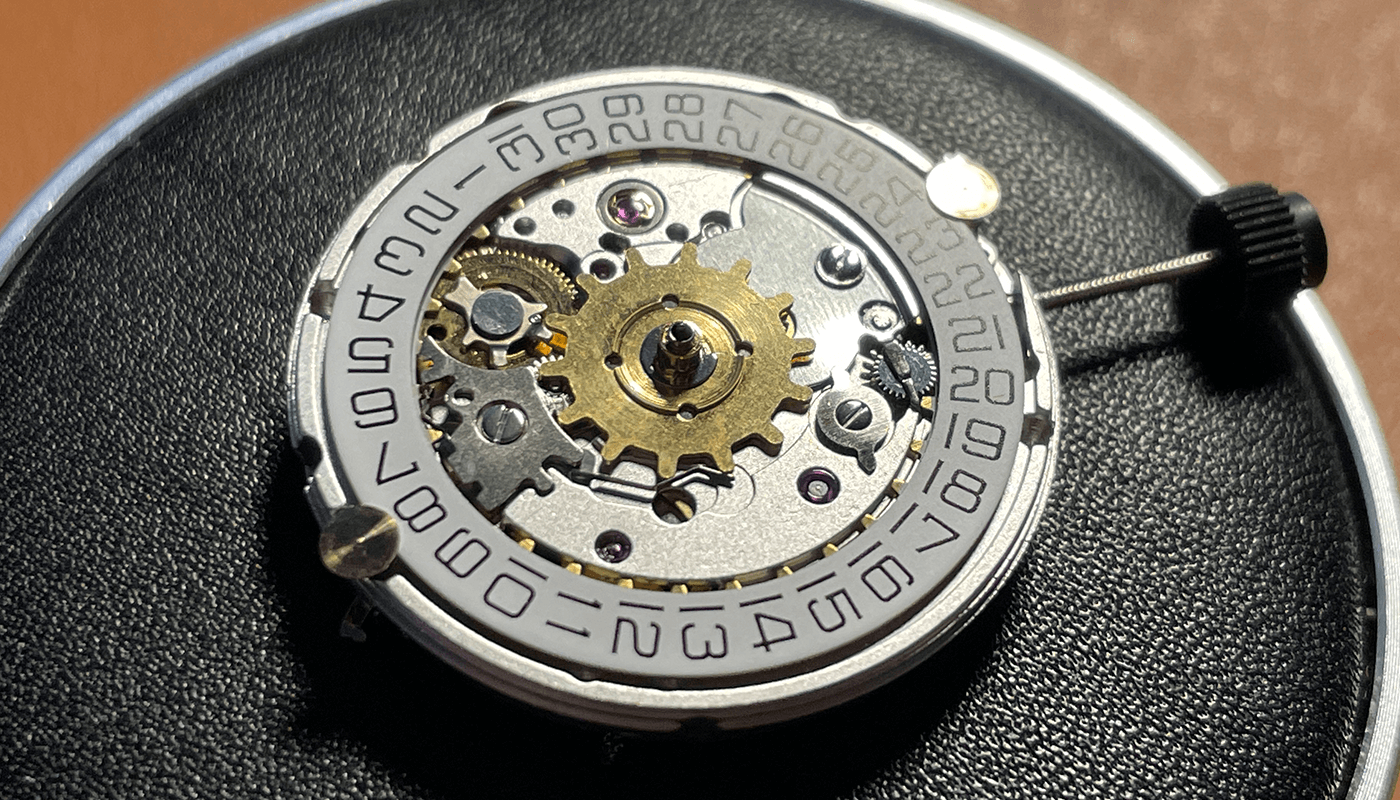
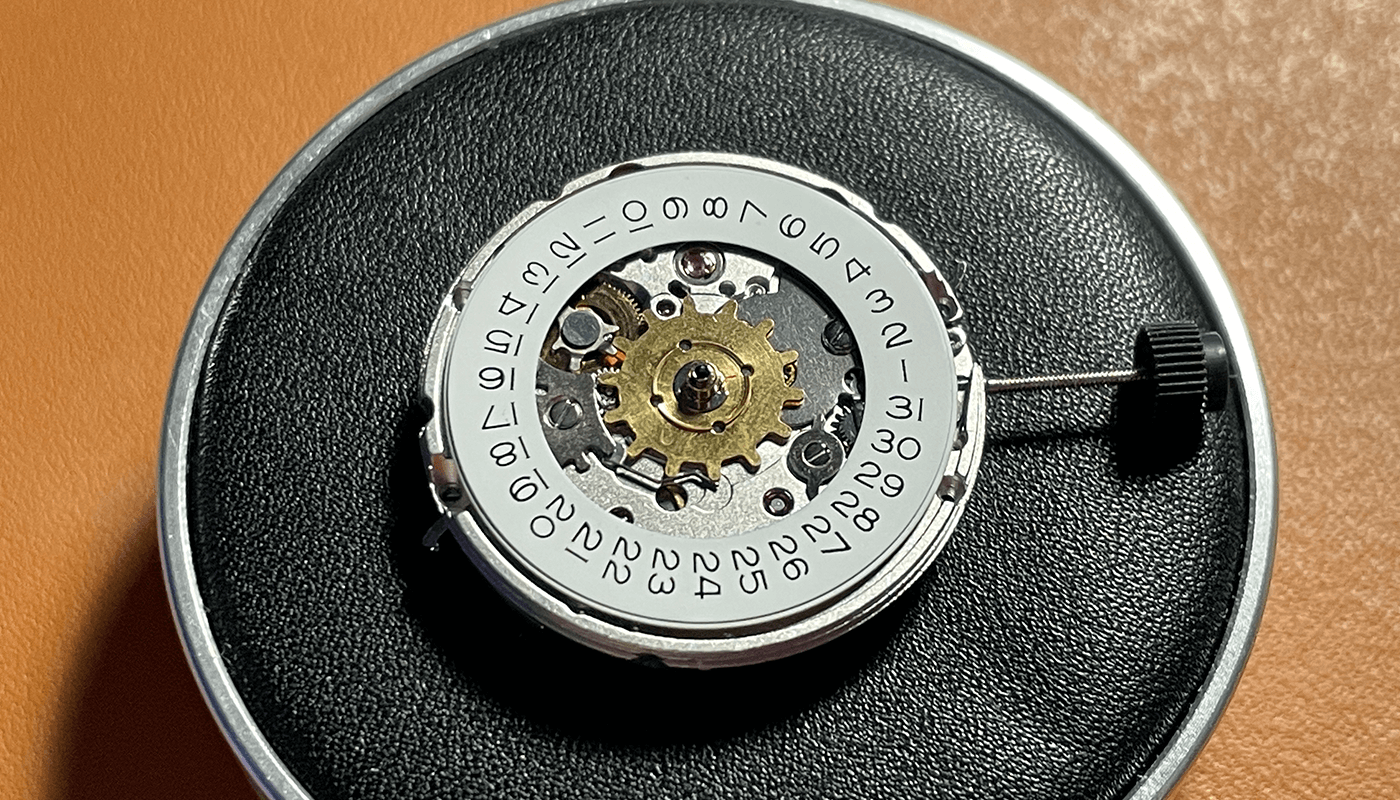
The 2836 movement i am using here is a Seagull ST2100, it comes with date and day wheel. Also comes with some hands.
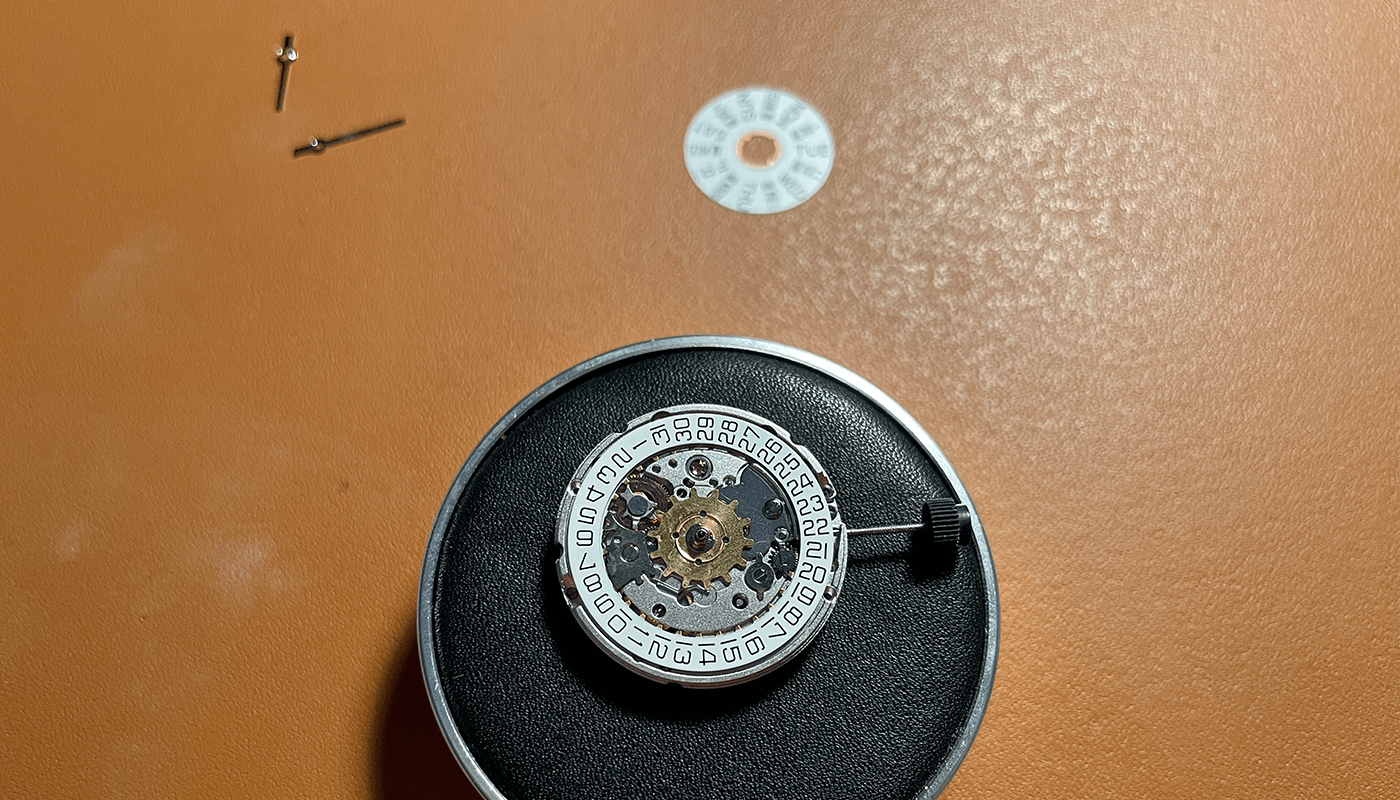
The first step is to remove the hands i cover with a see through bag and hand removers to remove the hands. Now your movement is ready for the next steps - set aside for the moment.
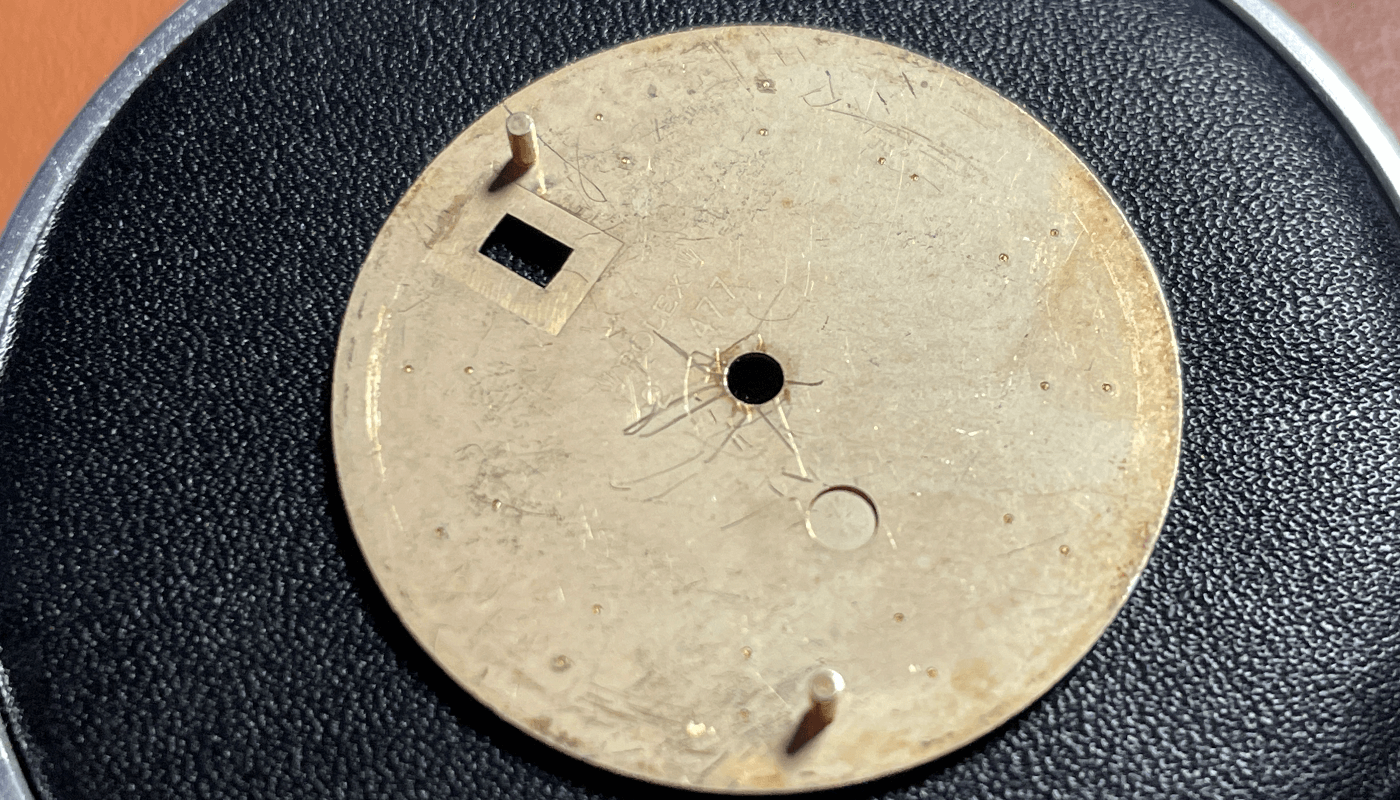
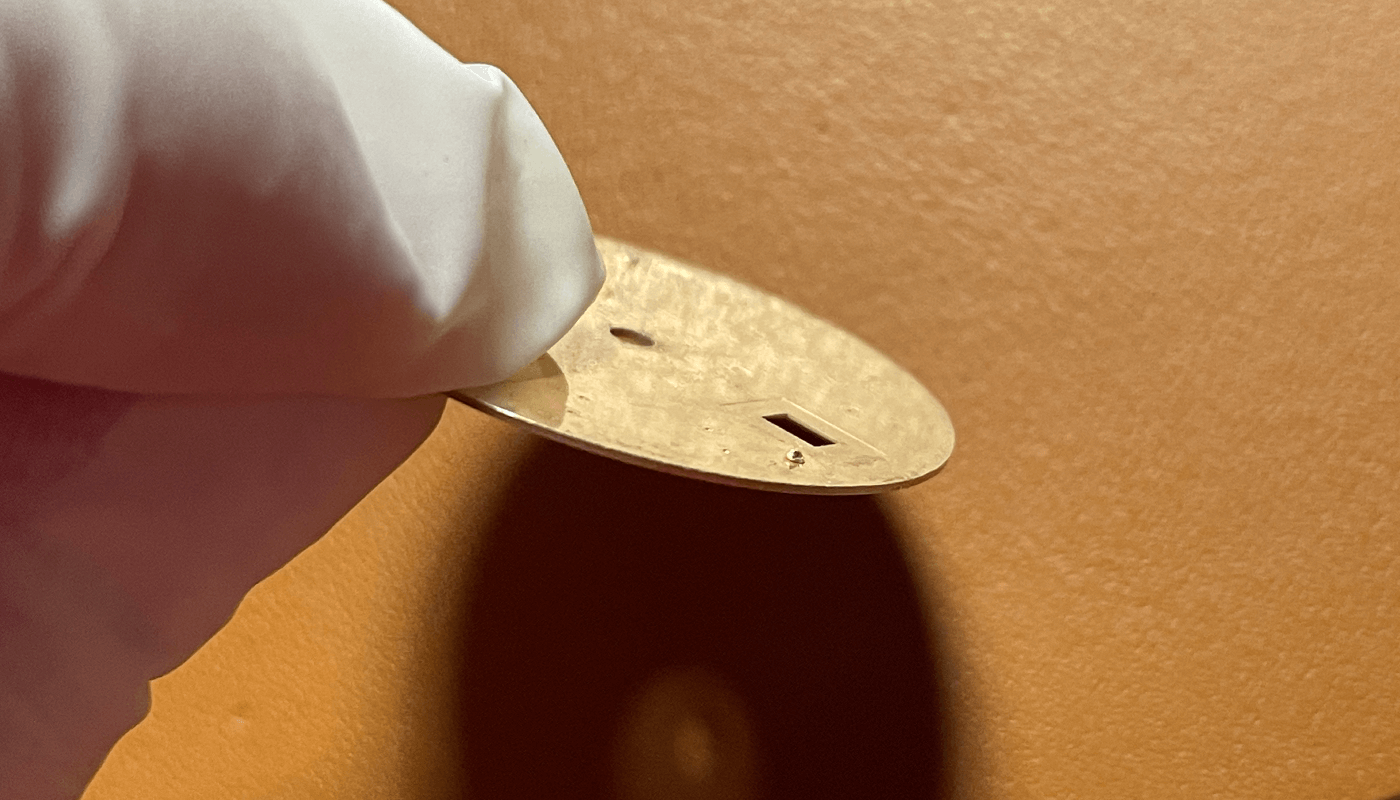
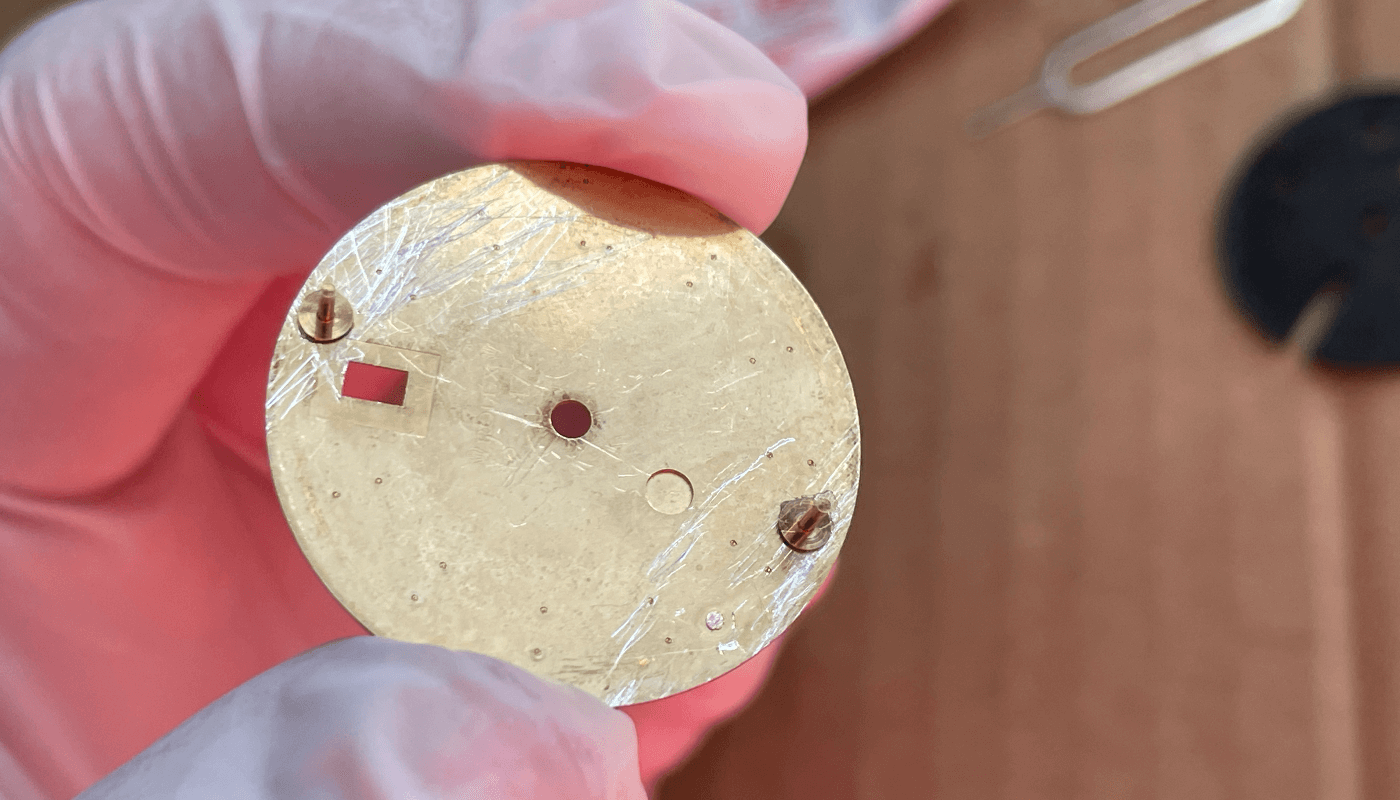
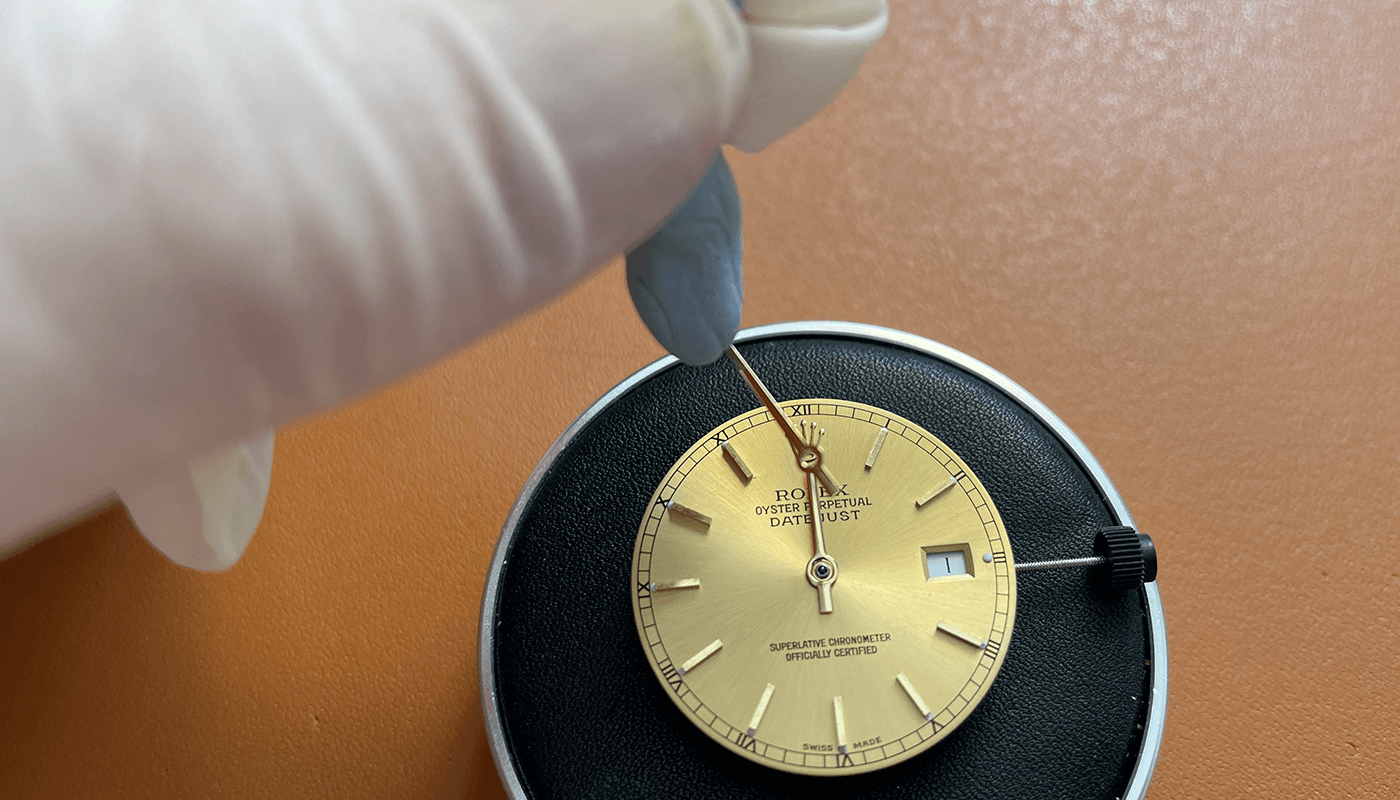
Because the genuine dial has dial feet for a genuine movement. We will need to remove the feet as later we will position for the 2836 movement.
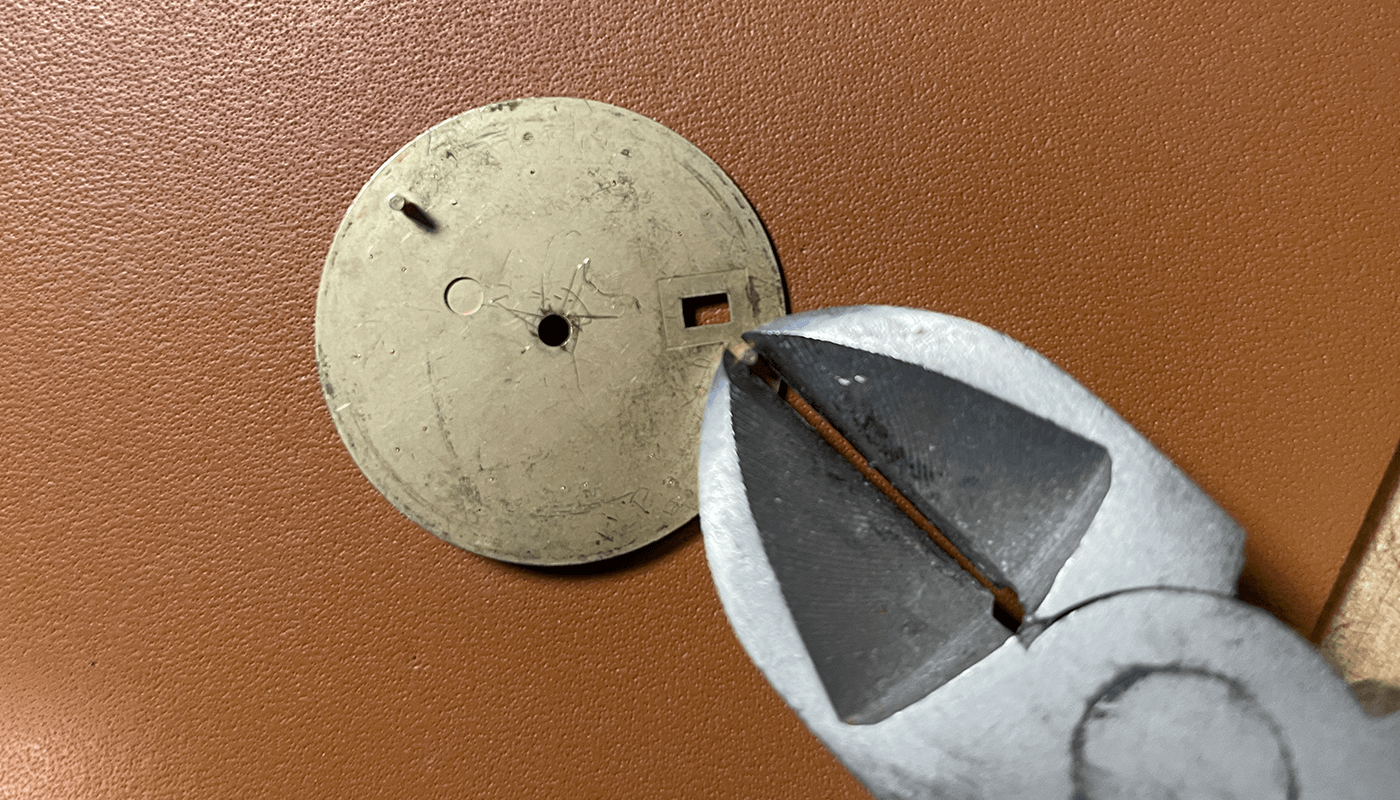
Use your pliers to snip off the dial feet, get as close to the dial as possible.
Once removed as much as you can with pliers you can see a little is remaining you will need to use a small foil to take this off and make it smooth with the dial back. This is important so the new dial feet can be added also it does not touch the date disc.
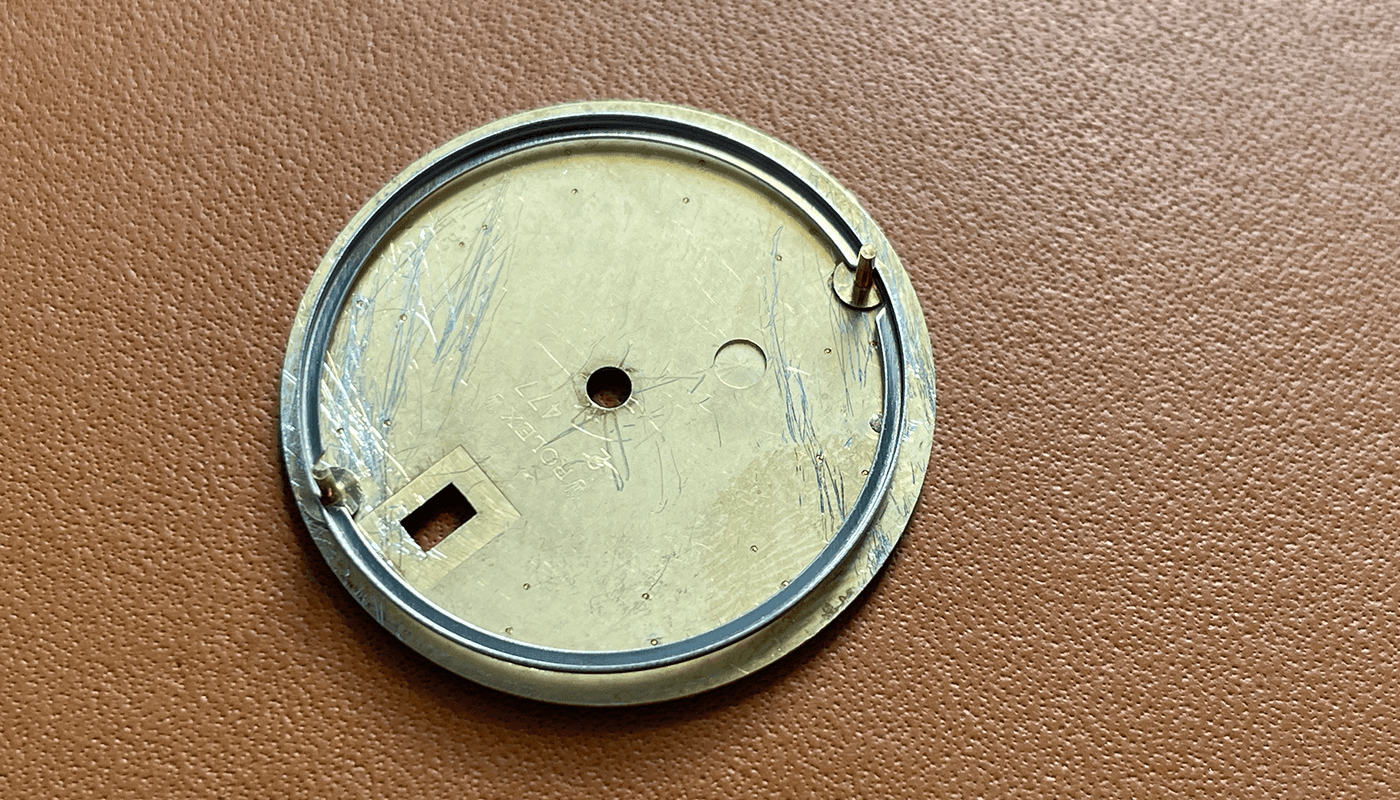
Im using cooper dial feet here to attach, im aligning them up on the movement. You can see i have the dial and movement with dial feet here.
This is a close up showing the dial feet. You can use the movement as a guide for attached the dial feet however im going to use a little tool.
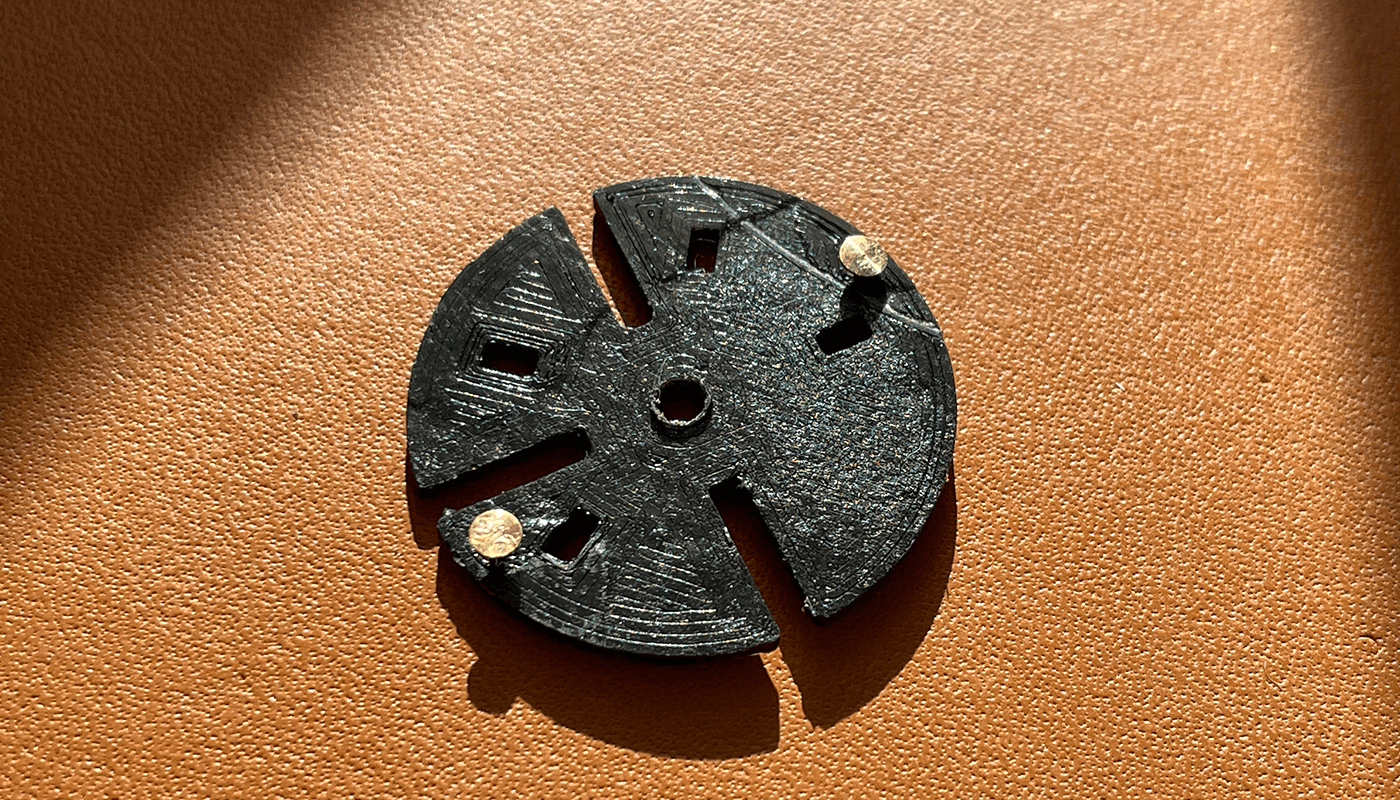
Here is a DWO (Date window overlay) tool i found on RWI and 3D printed its great to align the dial feet for the movement. Here is a link to the 3D modal
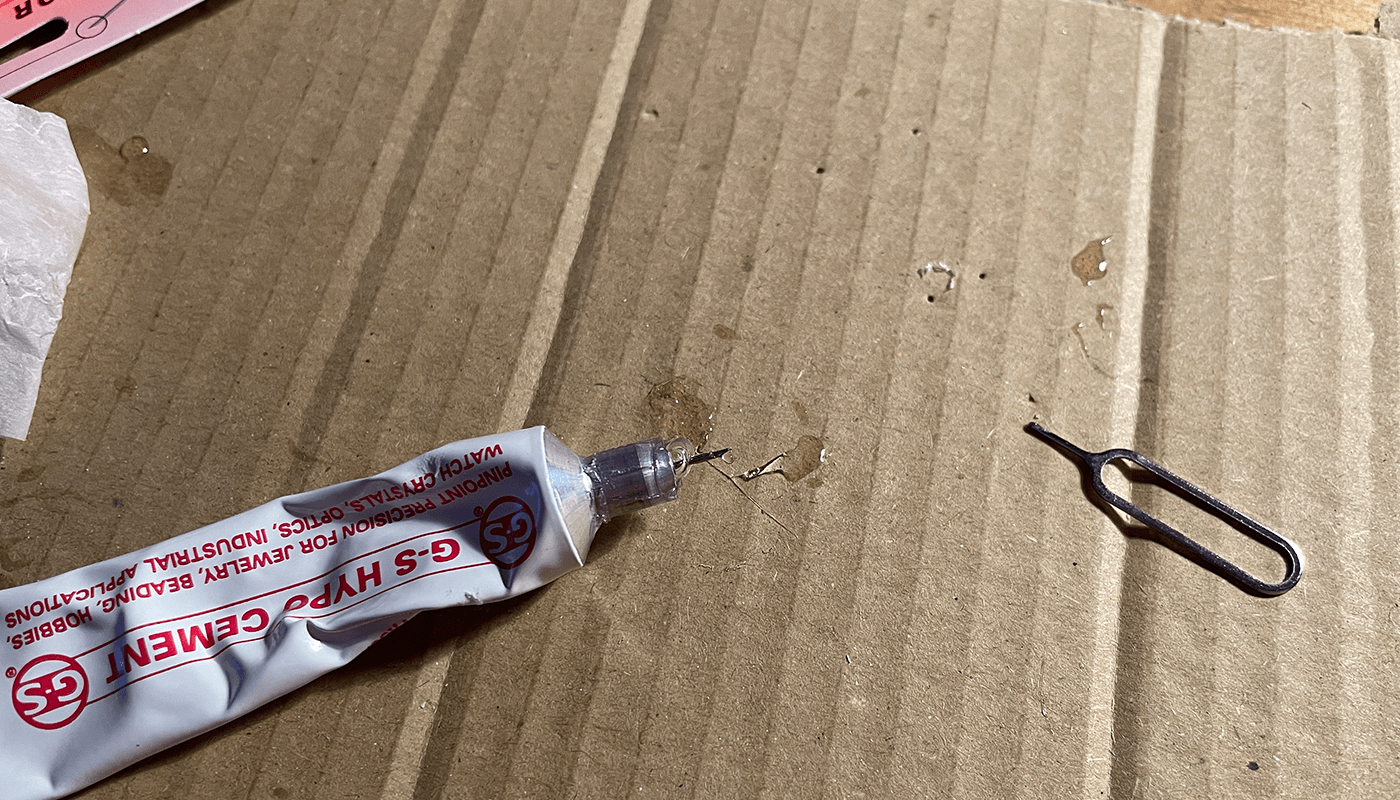
Im using GS Hypo Cement to attach the dial feet to the back of the dial
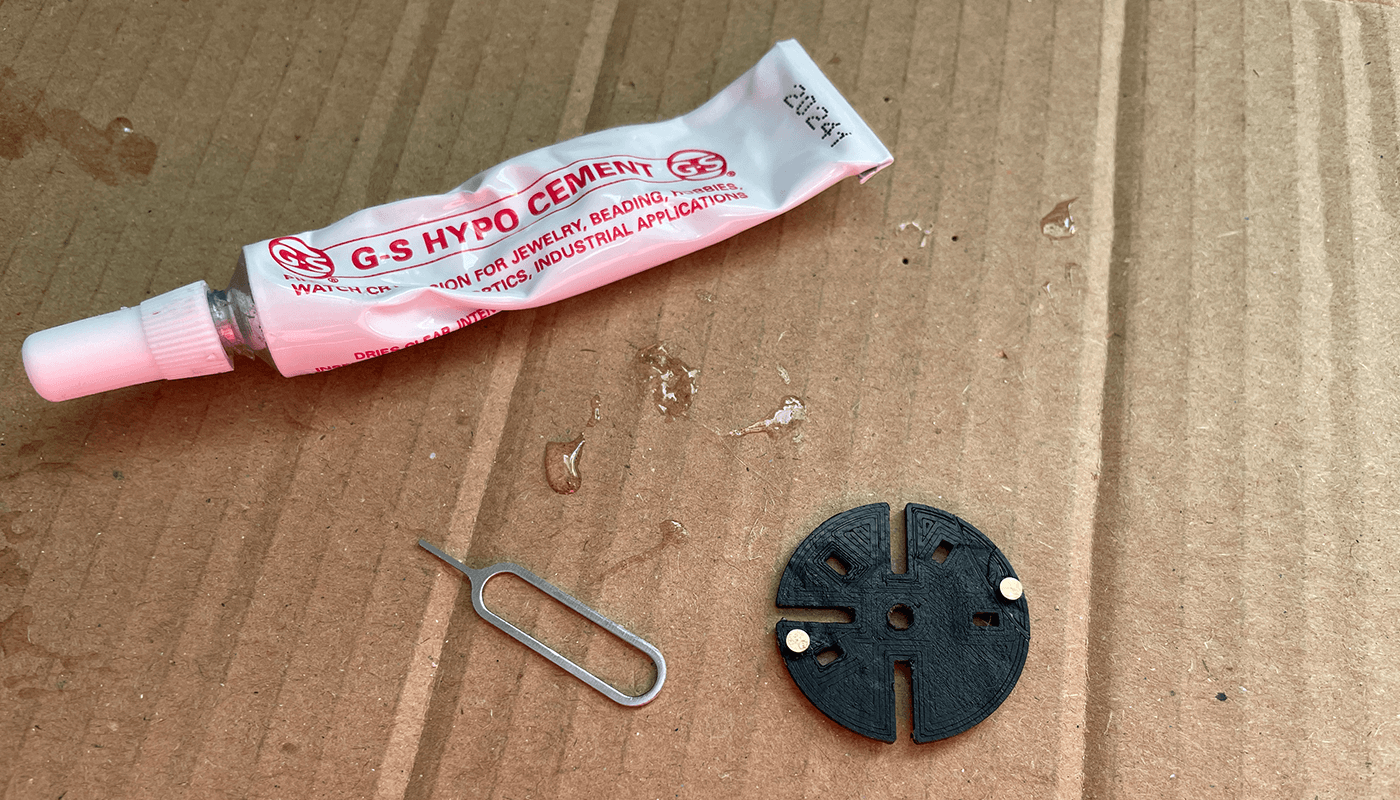
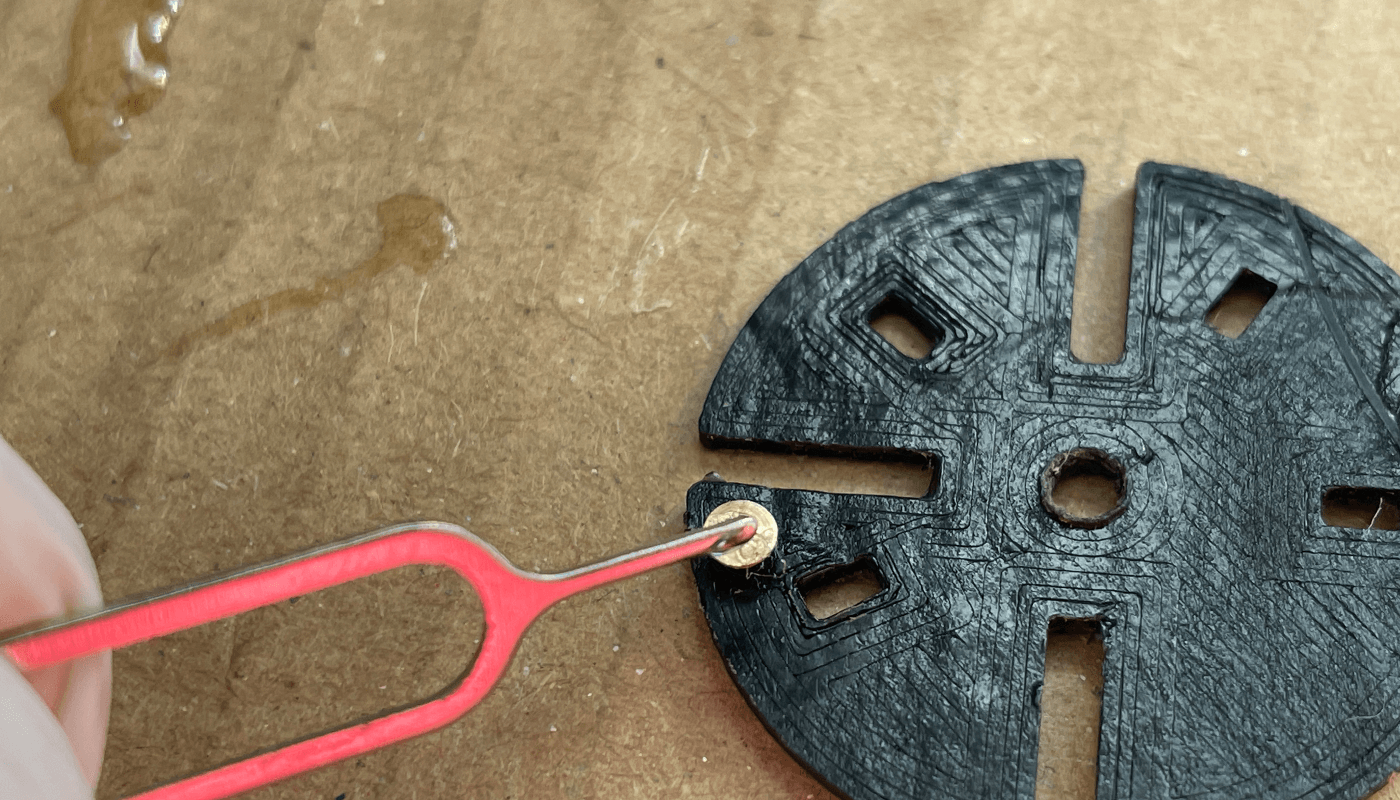
You can use a pin but here im using a SIM pin tool that comes with smartphones. The reason i use this is it does the job great. I add a little bit of glue to the sim pin and apply to the dial feet.
When you are ready push the dial on to the feet and make sure it is aligned with the date window on the DWO tool
Once you are happy with alignment remove the dial from the DWO tool and set aisde to set for around 2 hours.
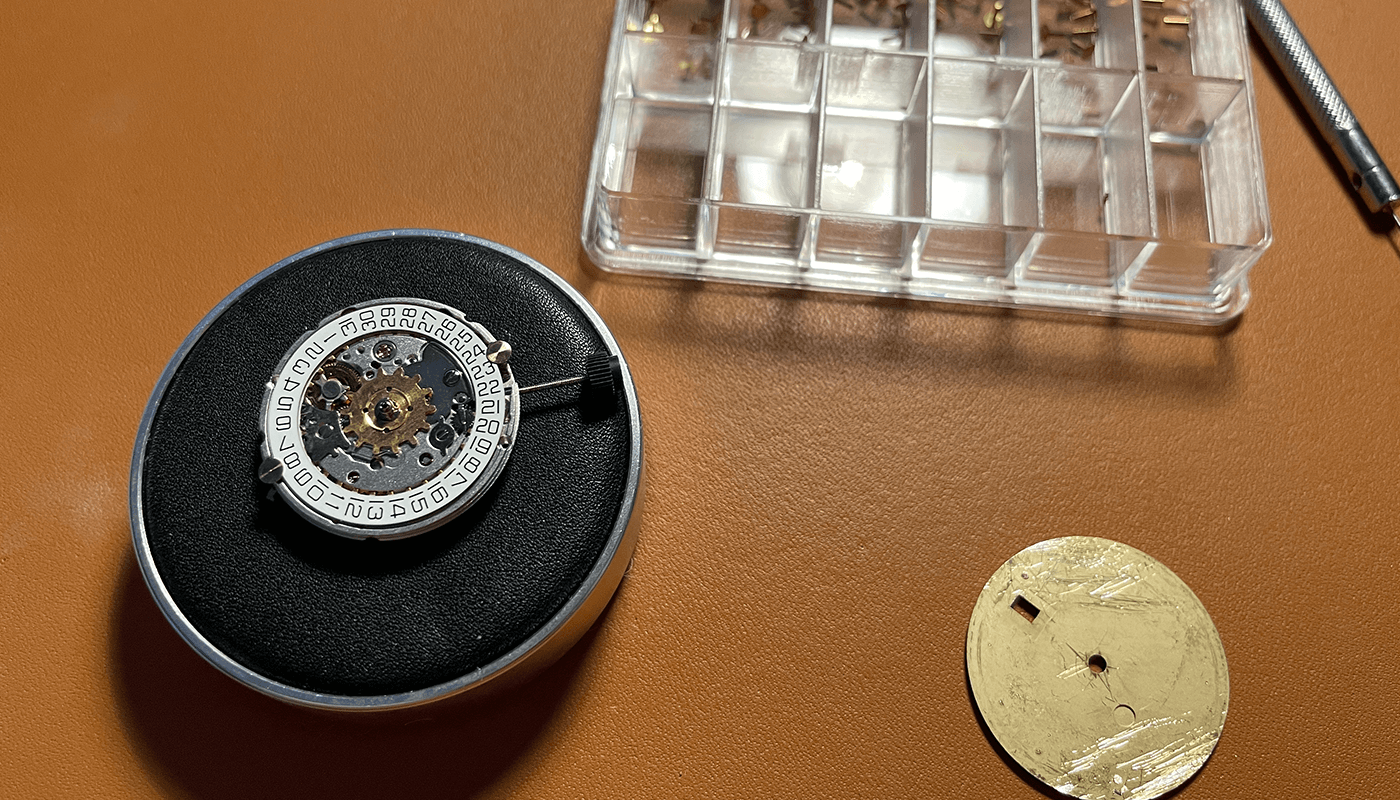
Dial and Date Wheel
Now the dial has dried you can use the dial spacer ring and add to the back of the dial ready to put onto the movement. Your dial is finished and ready for the movement.
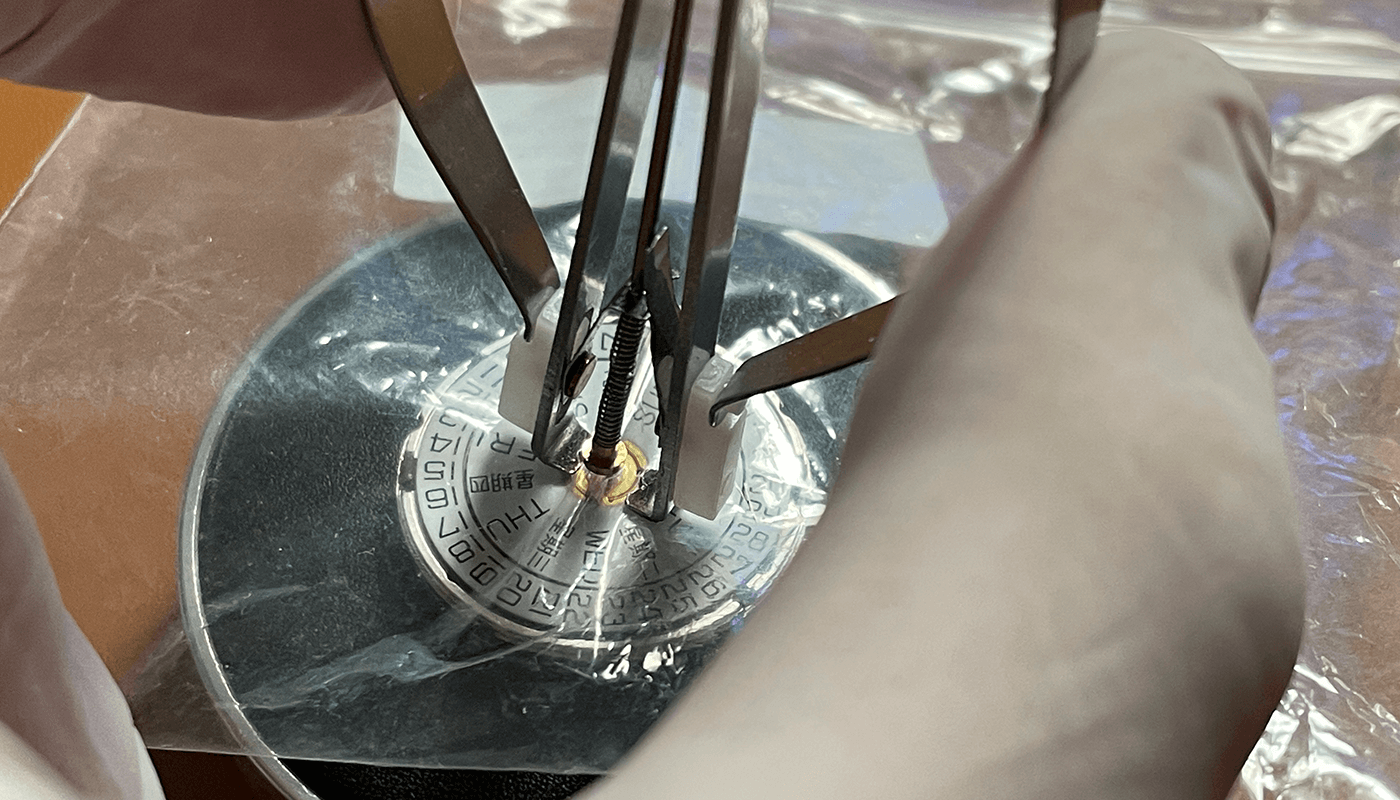
We need to add the date wheel onto the 2836 movement. I use GS Hypo Cement again to attach the date wheel.
With the DWO we need to add 4 small dots using the trusty sim pin tool to apply glue to the back of the date wheel overlay.
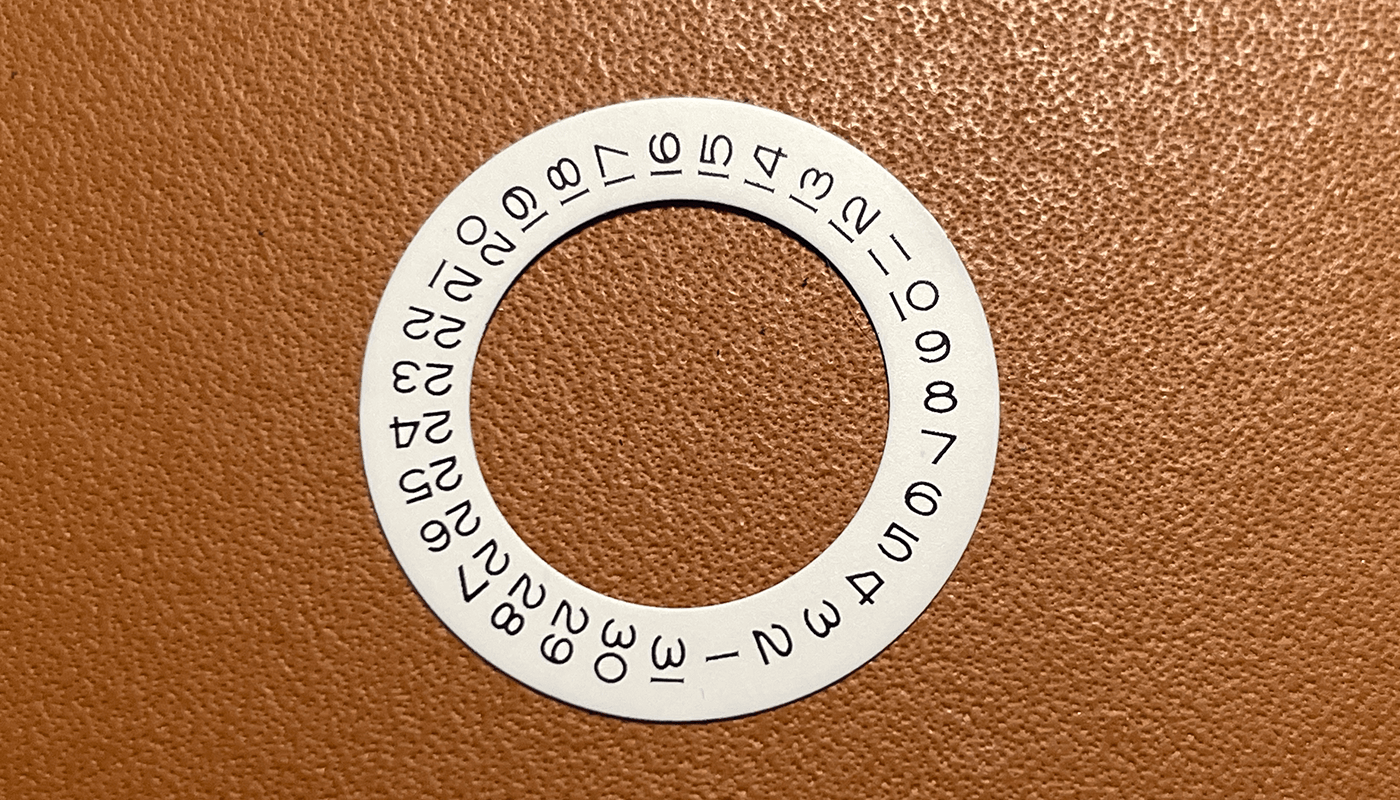
When ready put the date wheel with glue on the back on top of the date wheel on the 2836 movement. You now have the rolex style font date wheel overlay
Use your new dial to place over the top to ensure the alignment of the date font is good. If you are not happy remove the DWO from the movement and remove the glue off. Repeat the steps above until you are happy
You can now see the dial is on the movement and is ready to be secured
Secure the dial with the levers on the back of the movement. Push into the movement and make sure the dial is secured
Hands onto Movement
Now its time to put the hands on to the movement. First you need to make sure the time is 12 before adding the hour hand and then the minute hand. Once ready you will need to add the second hand. The details are light here. I cover hands onto movement in much more detail here
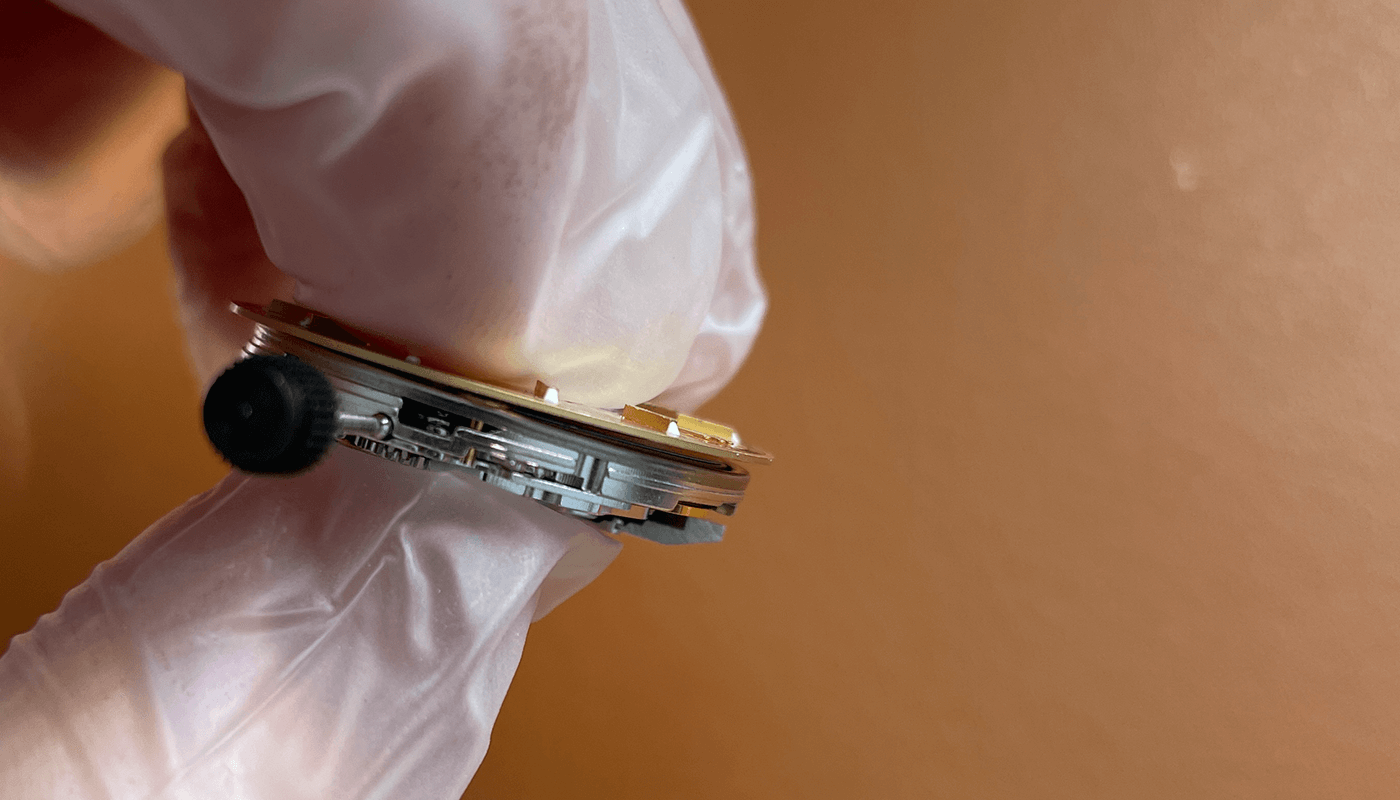
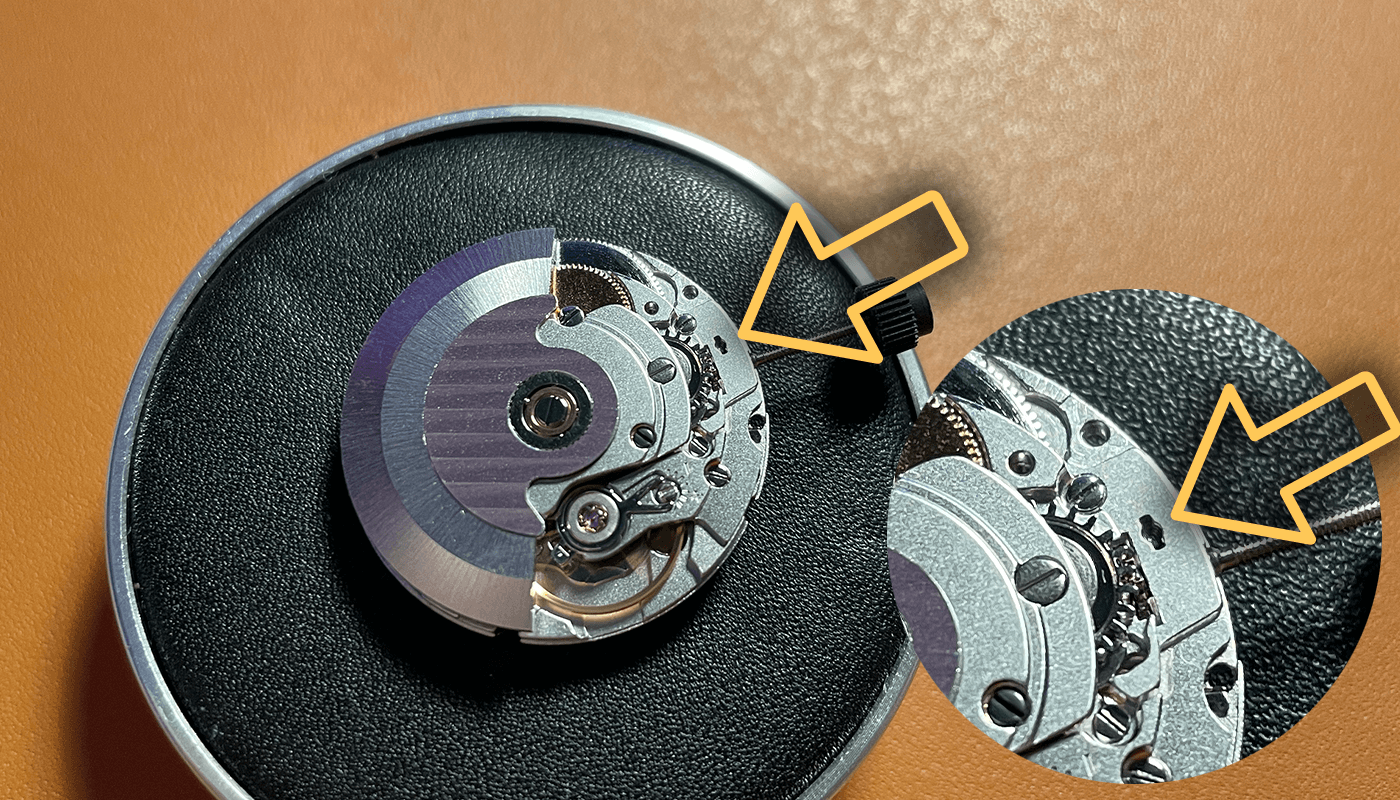
Once the hands are on to the movement you will need to remove the stem. You can see the below you need to put a small screwdriver into the hole and make sure the stem is in the winding position. Push gently and the stem will come out easy.
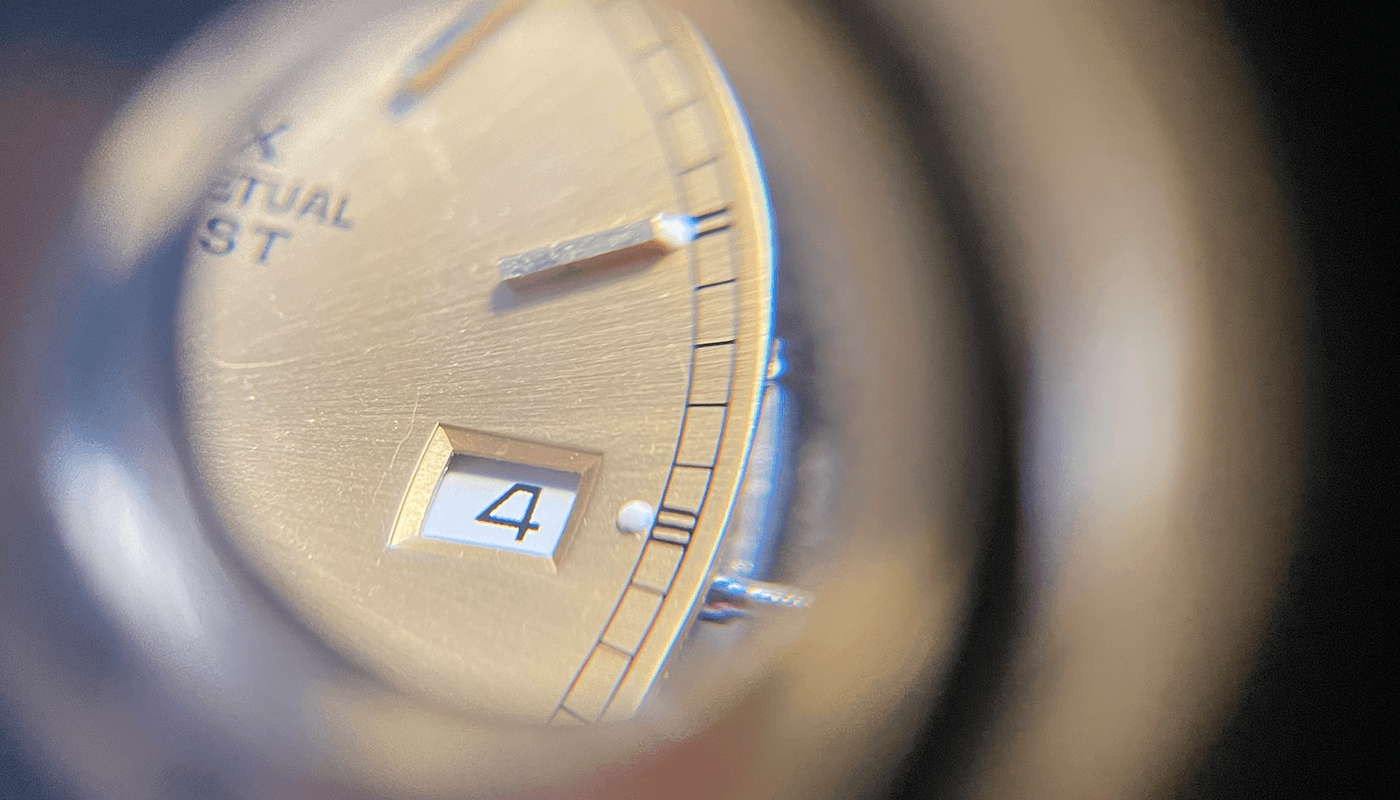
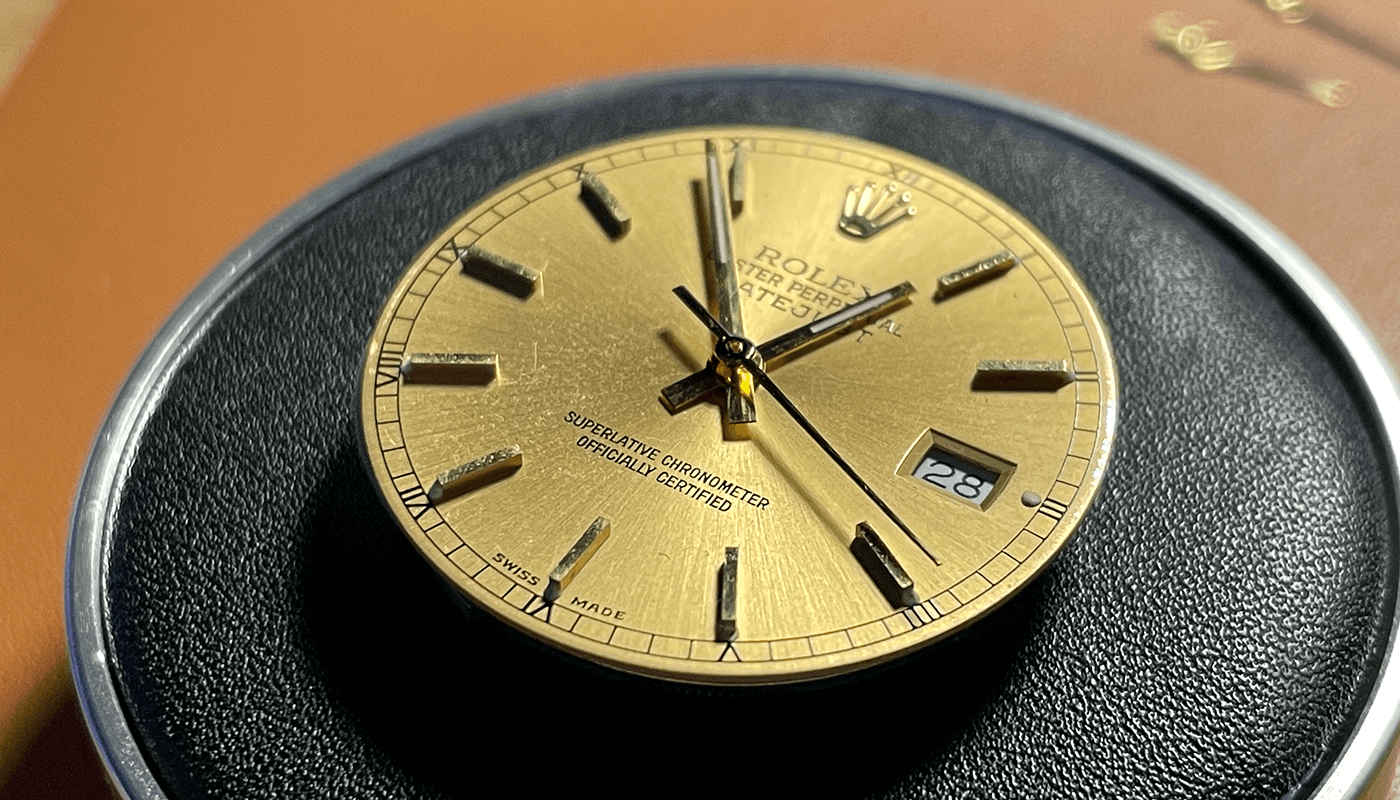
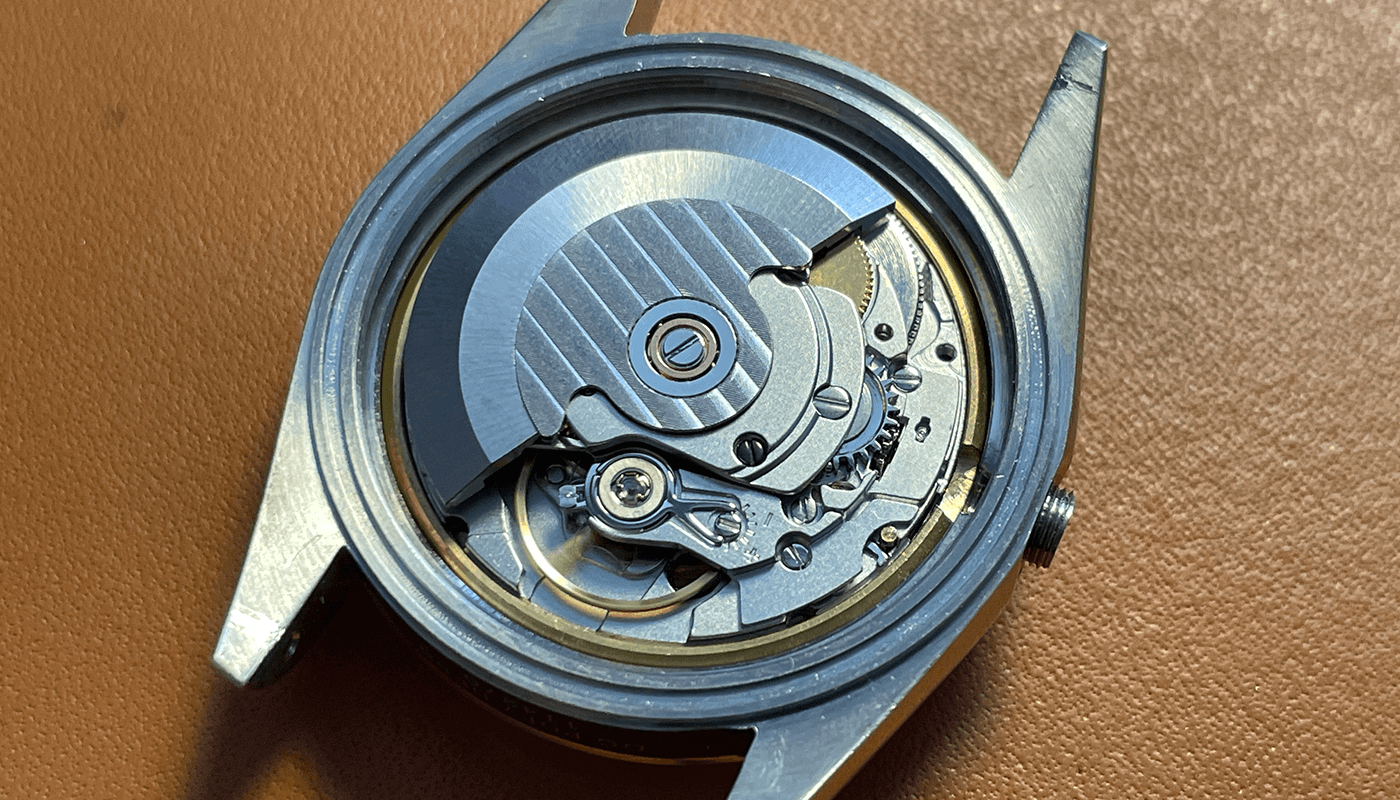
Here you can see all the hands on the movement and the excellent date wheel alignment
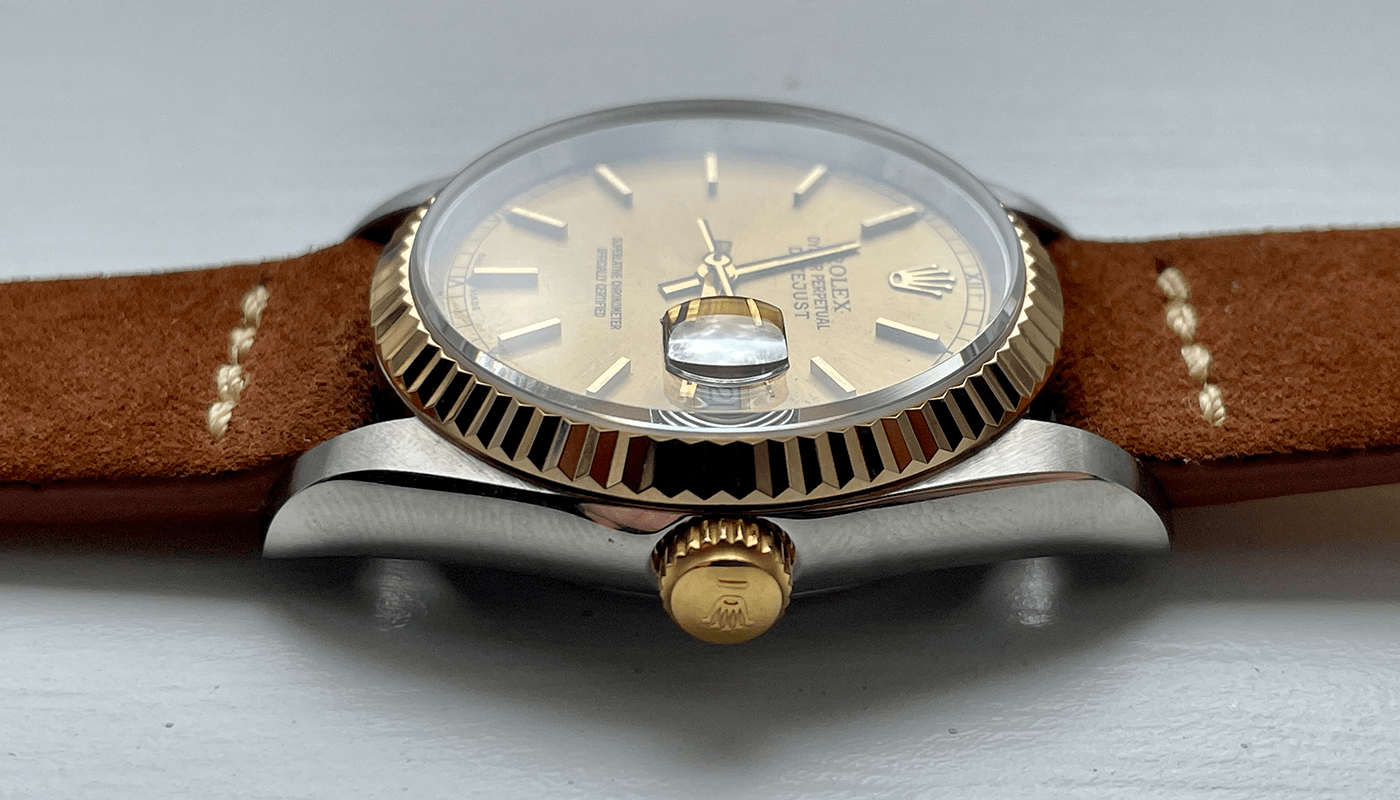
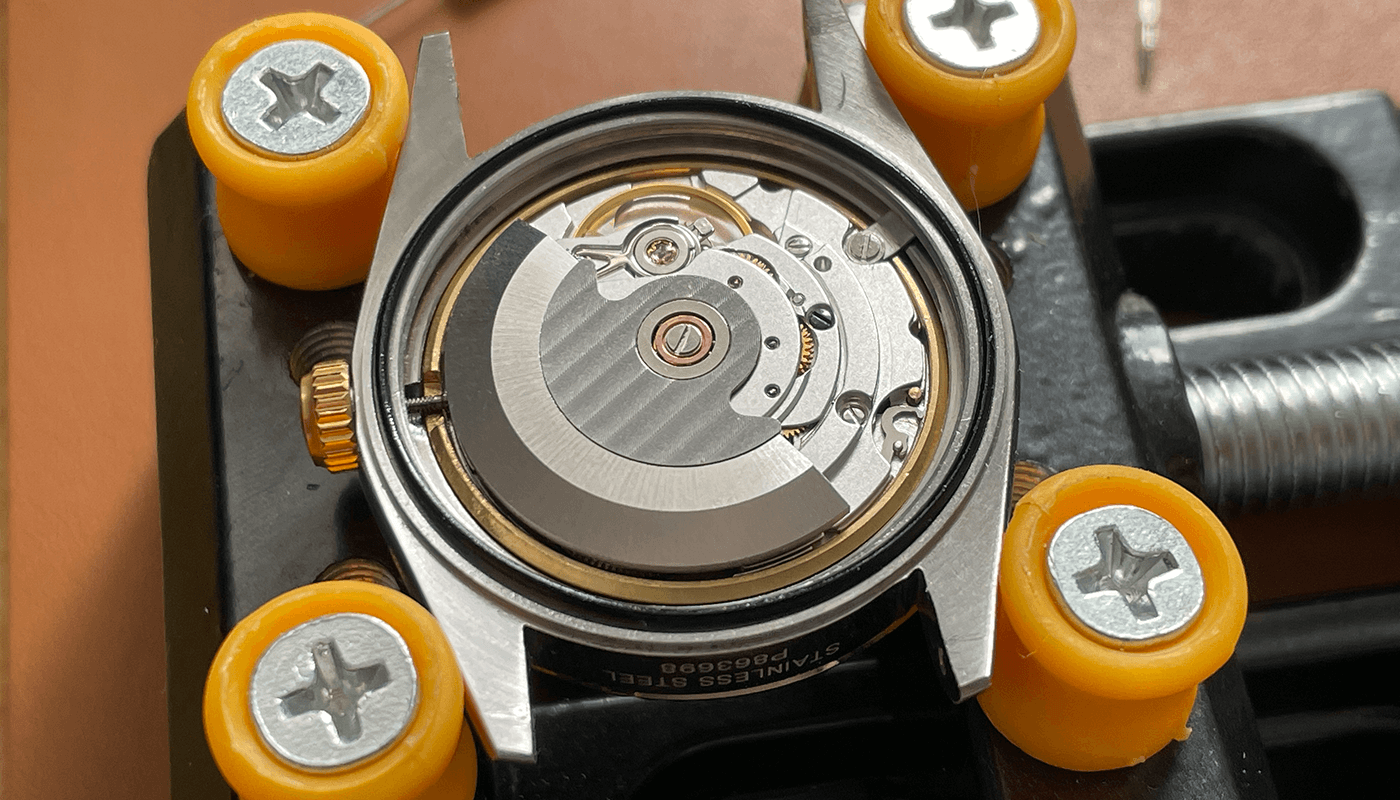
Movement into Case
Now we have the wonderful two tone case, in hand this looks amazing!
Put your movement and dial on the movement cushion and place the case over the top. Make sure to use a dust blower to remove any dust from inside the case or on the dial
Using the movement cushion you can flip over the case and remove. You now add the movement ring around the movement.
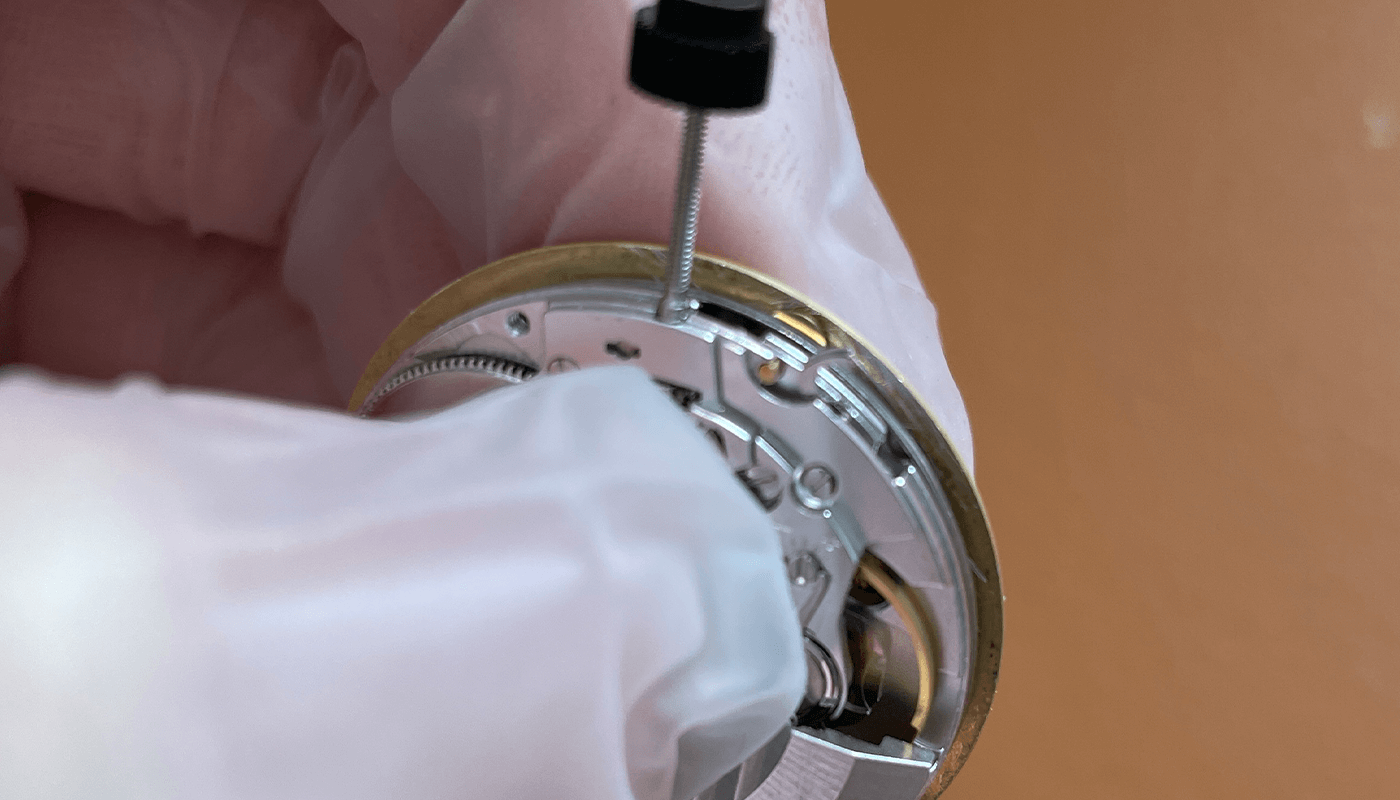
Now time to cut the step to size. Make sure you measure the stem twice and cut once.
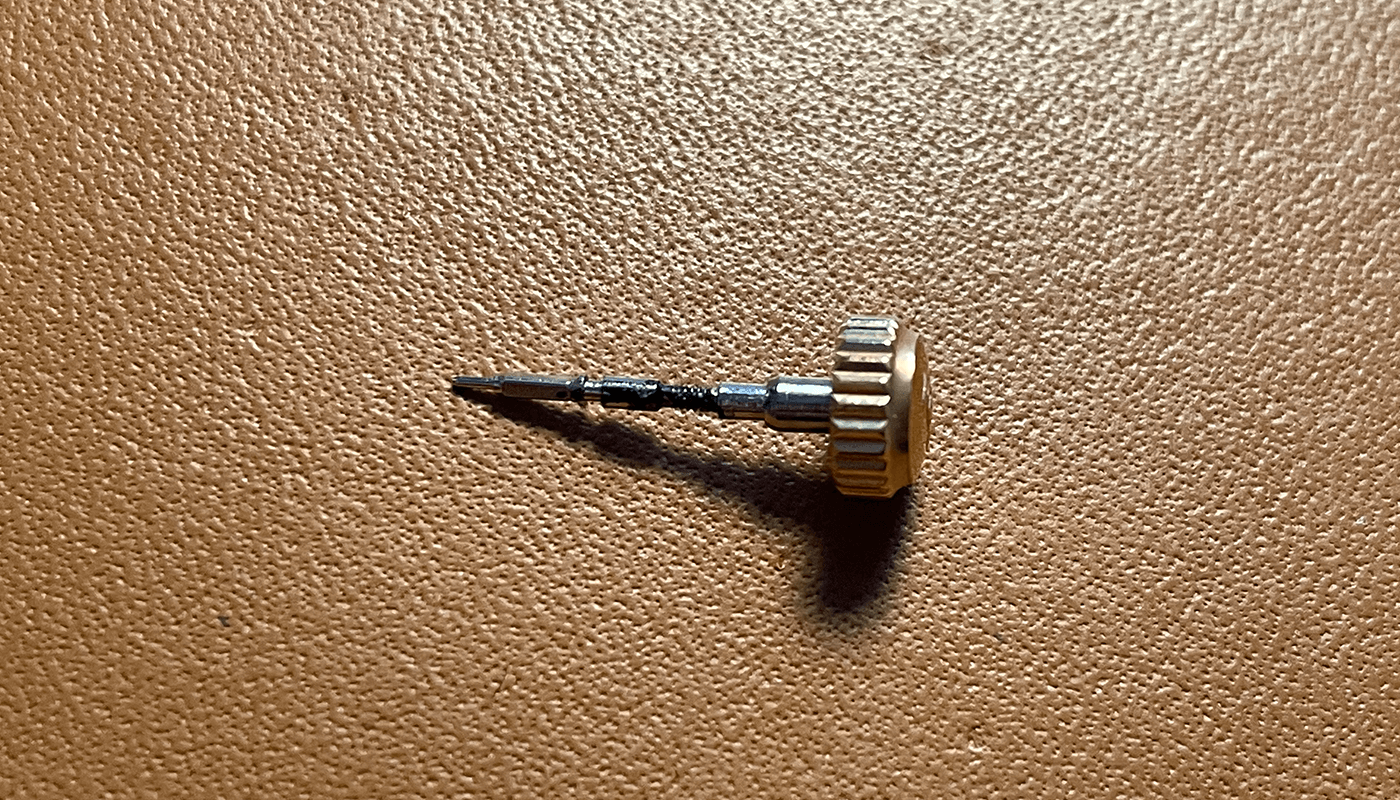
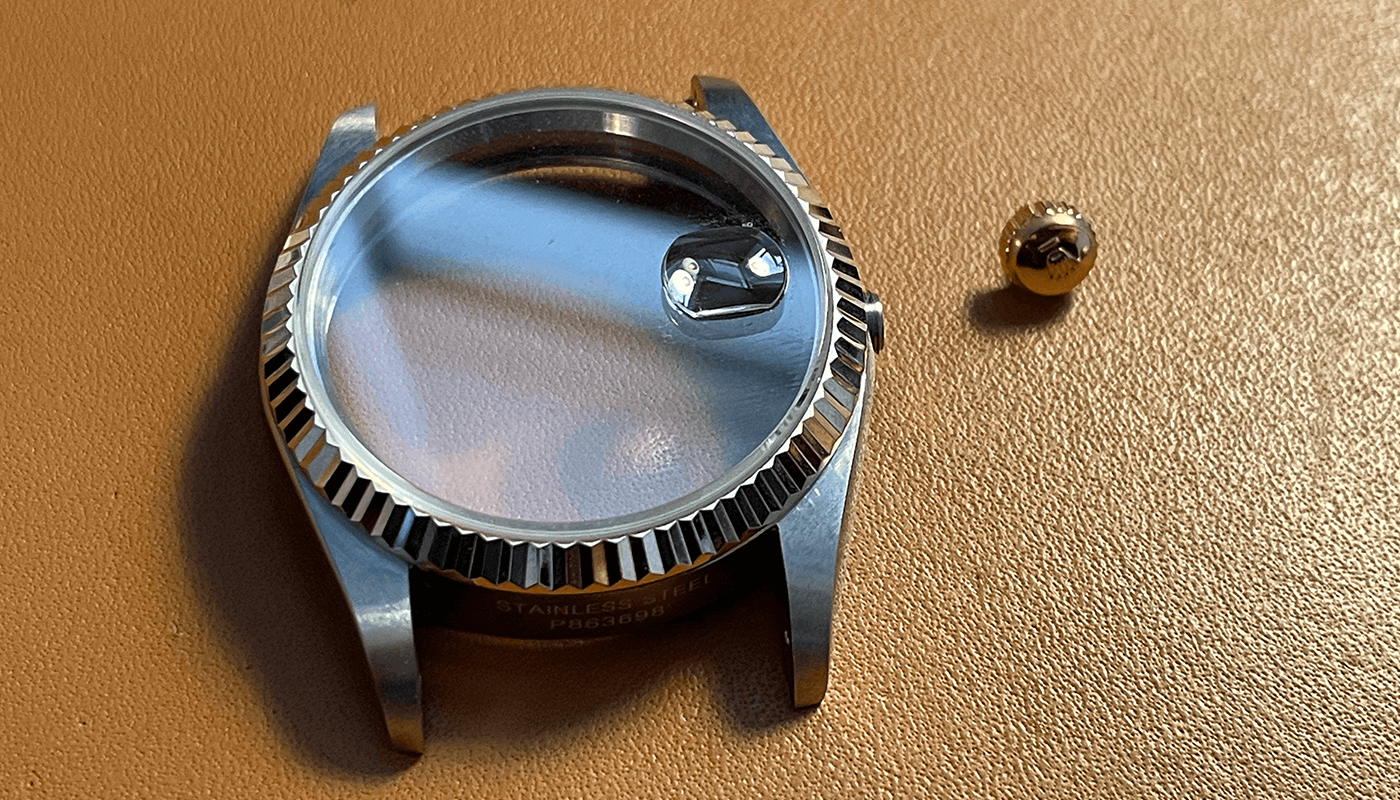
Once ready you can apply the crown and when ready try the stem in the movement.
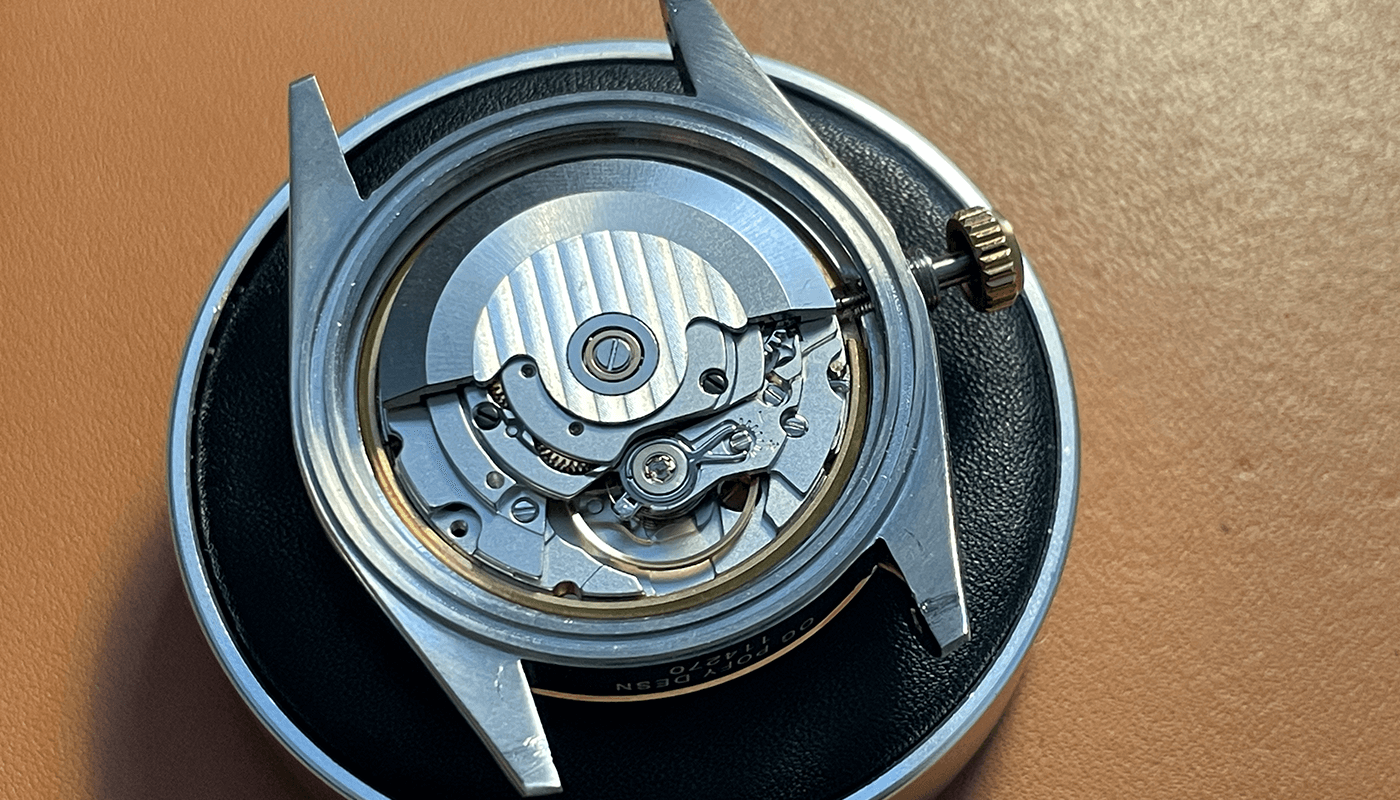
Now take some of your movement clamps and screws and secure the movement in the case

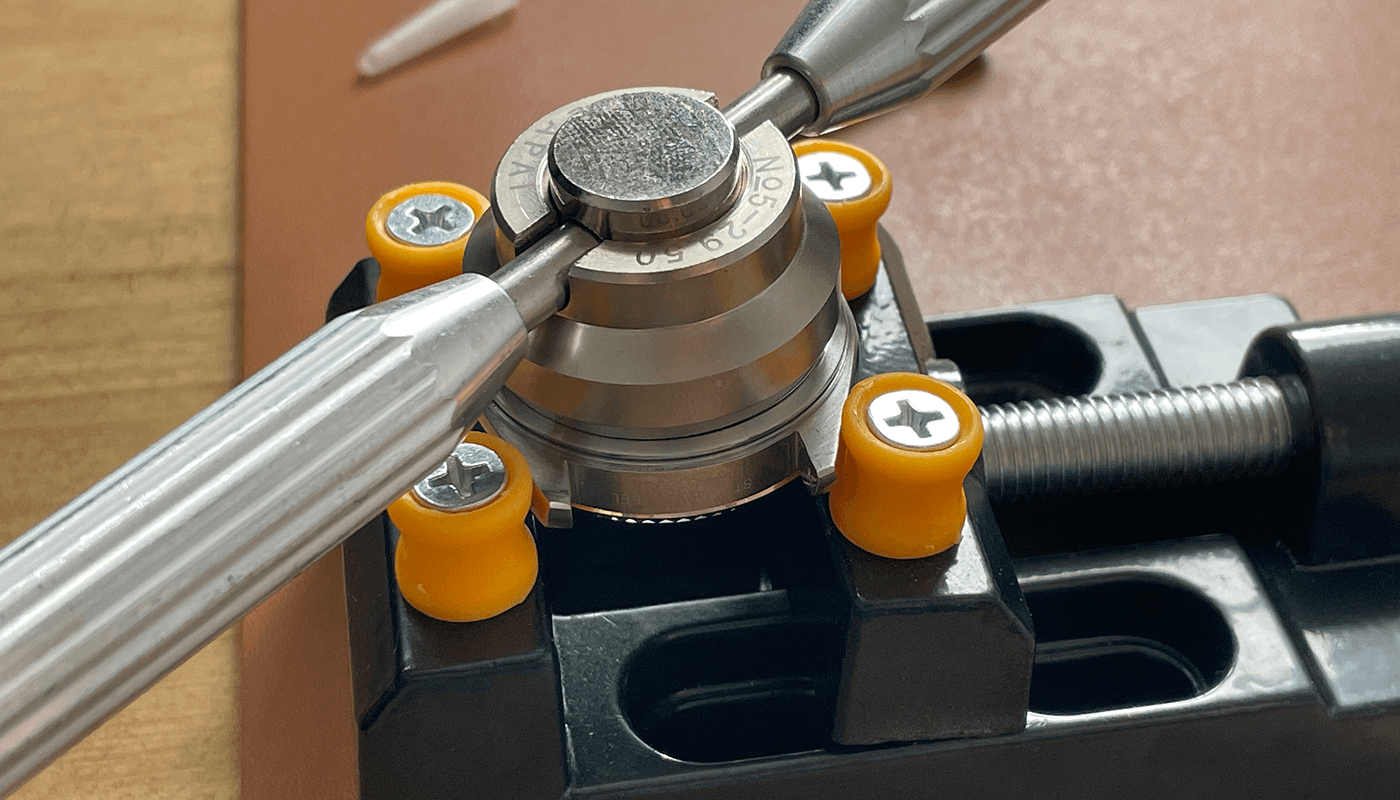
Use some greece on the ring and place in the back of the movement ready to secure the case back.
Screw the case back by hand and when you cannot tighten no more. You use the case back tool to ensure the case back is tight.
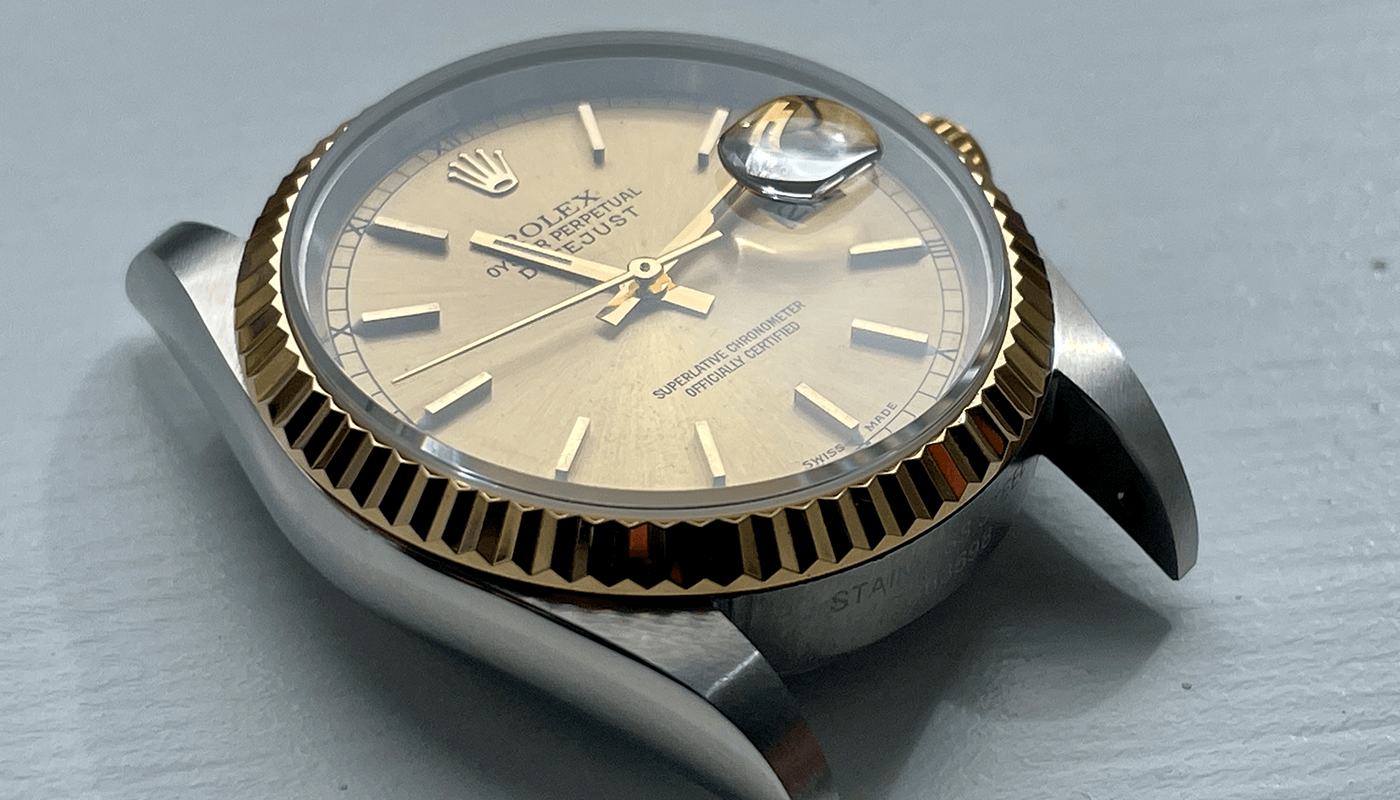
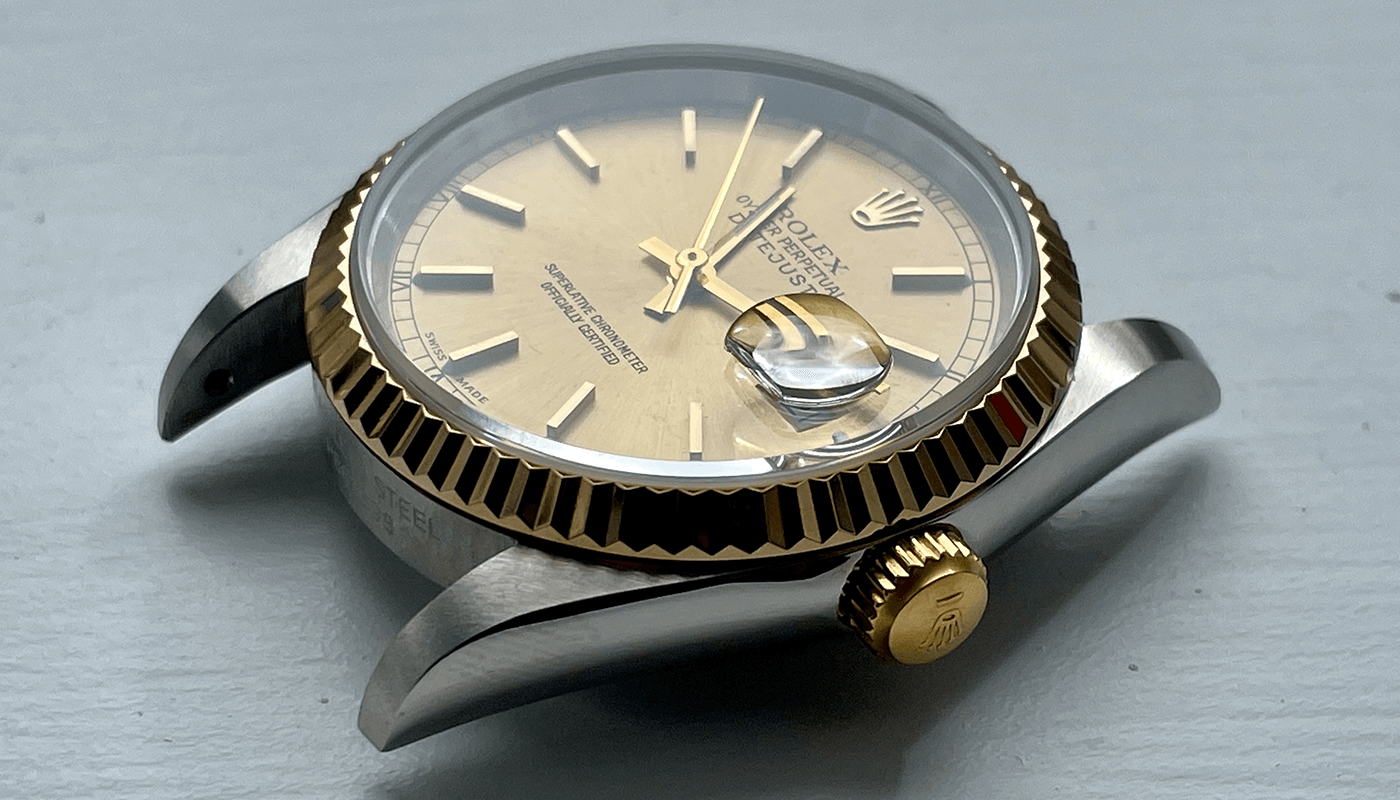
The finished build
The finished build i added a suede brown strap and here is the finished photos