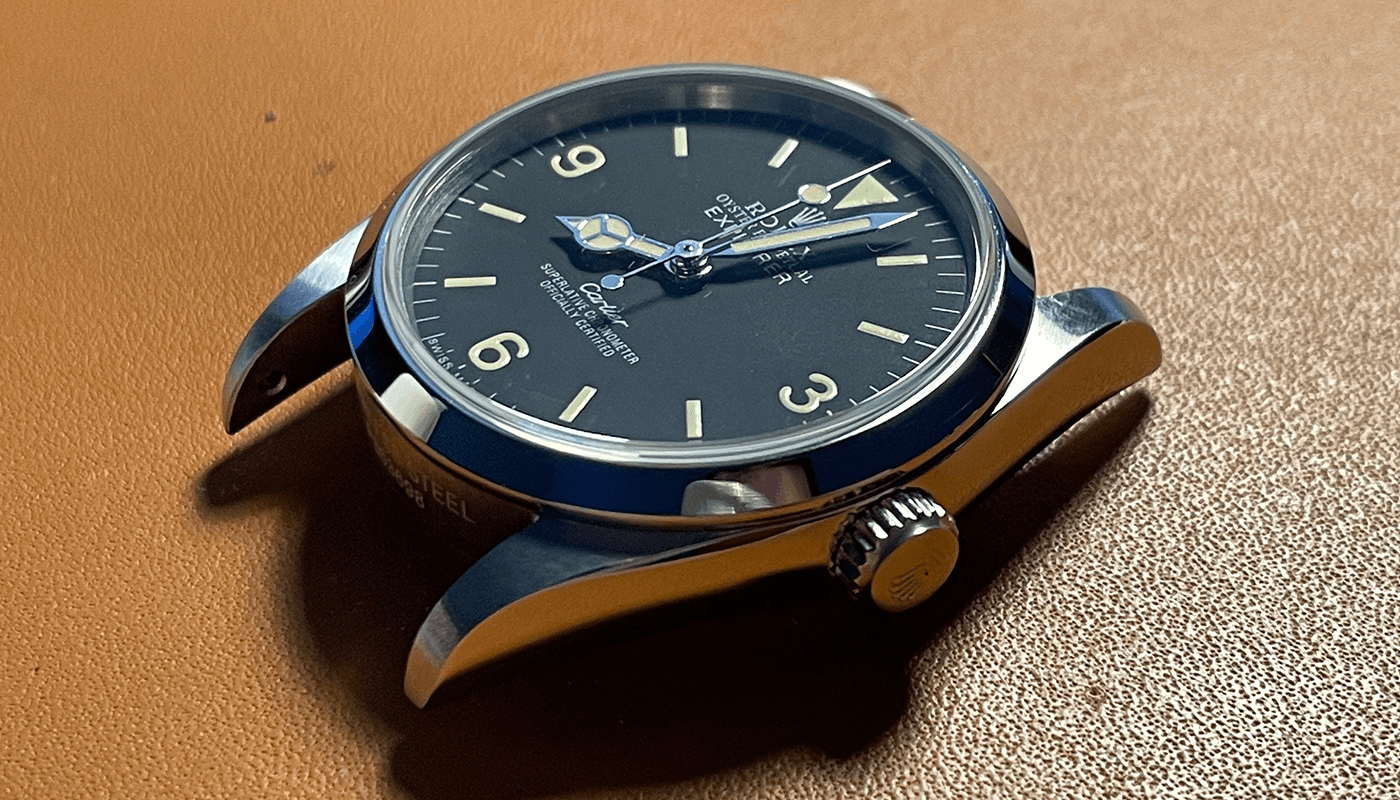
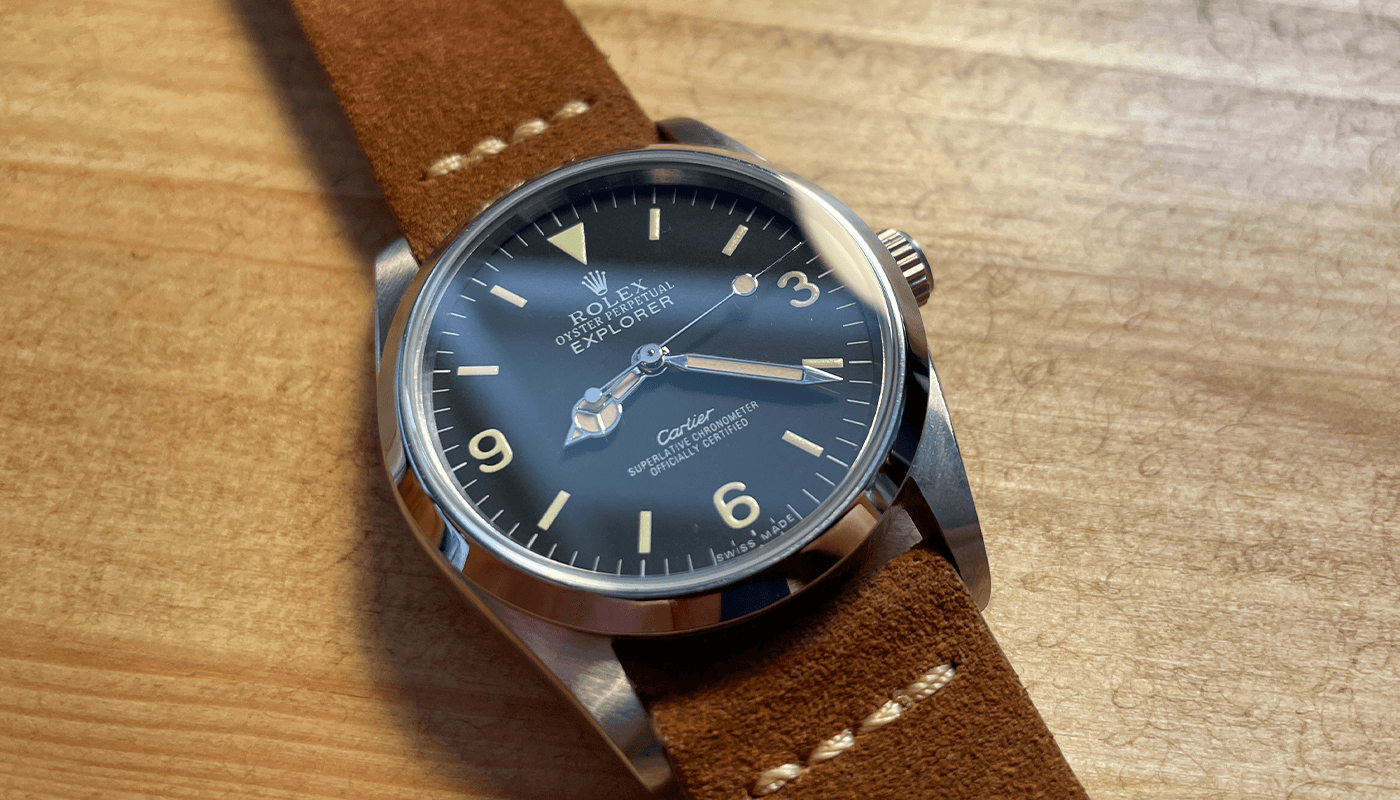
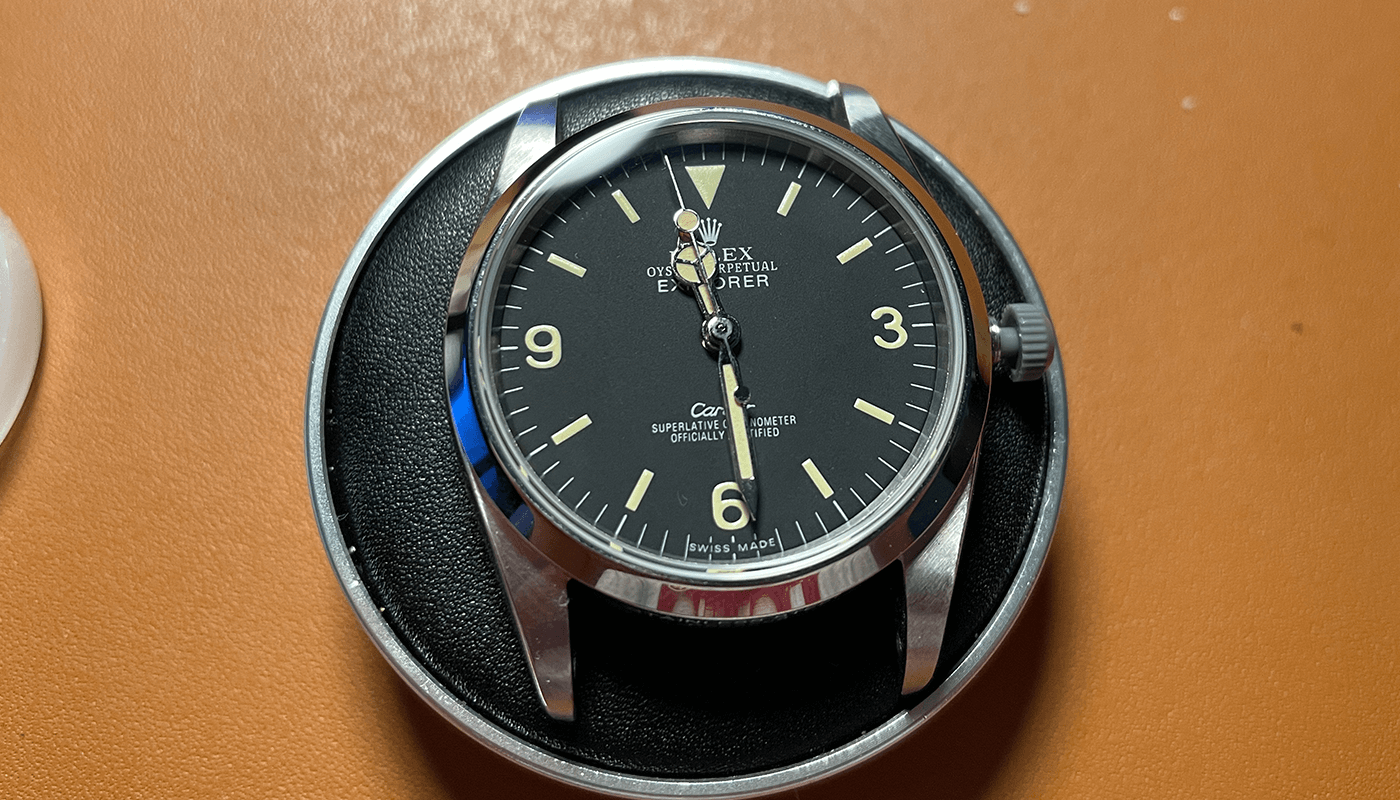
Once i built my vintage submariner and owning a Rolex from the 1980's my love for vintage watches has gone crazy and now as i watch build im wanting to build more and more vintage pieces. This is my latest build a Rolex Explorer 1016 with a Cartier stamp on the dial
Sourcing Parts
For this build i used a genuine Miyota 8215 movement for the watch and sourced the dial and case from Raffles. While picking the hands and strap up on eBay.
The Miyota 8215 movement has a 21,600 bph and makes it great to use in this build, being a Japanese built movement it makes it more quality movement.
Get Miyota 8215 Movement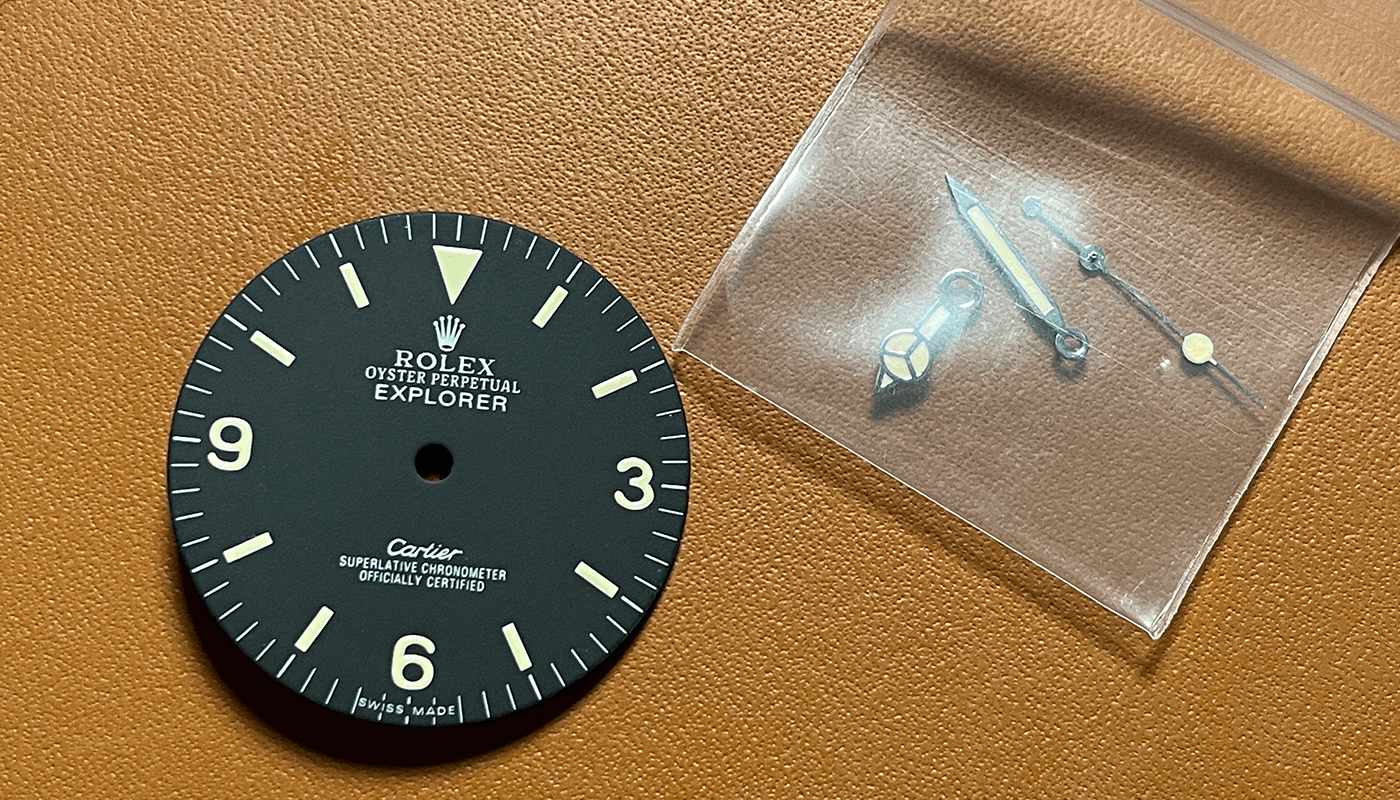
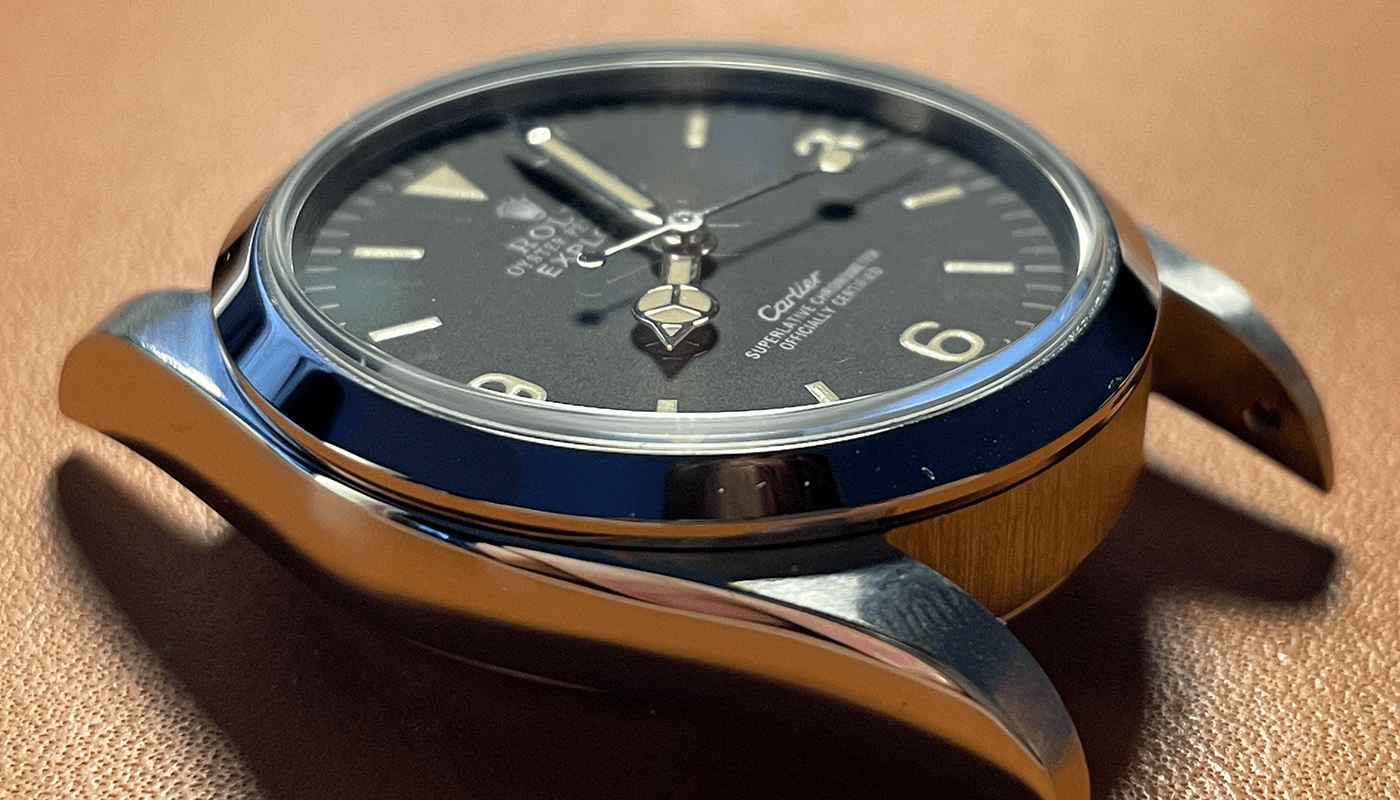
I wanted a vintage dial for the explorer but something with a little extra flair i picked up this dial from Raffles with Cartier stamp
Get Dial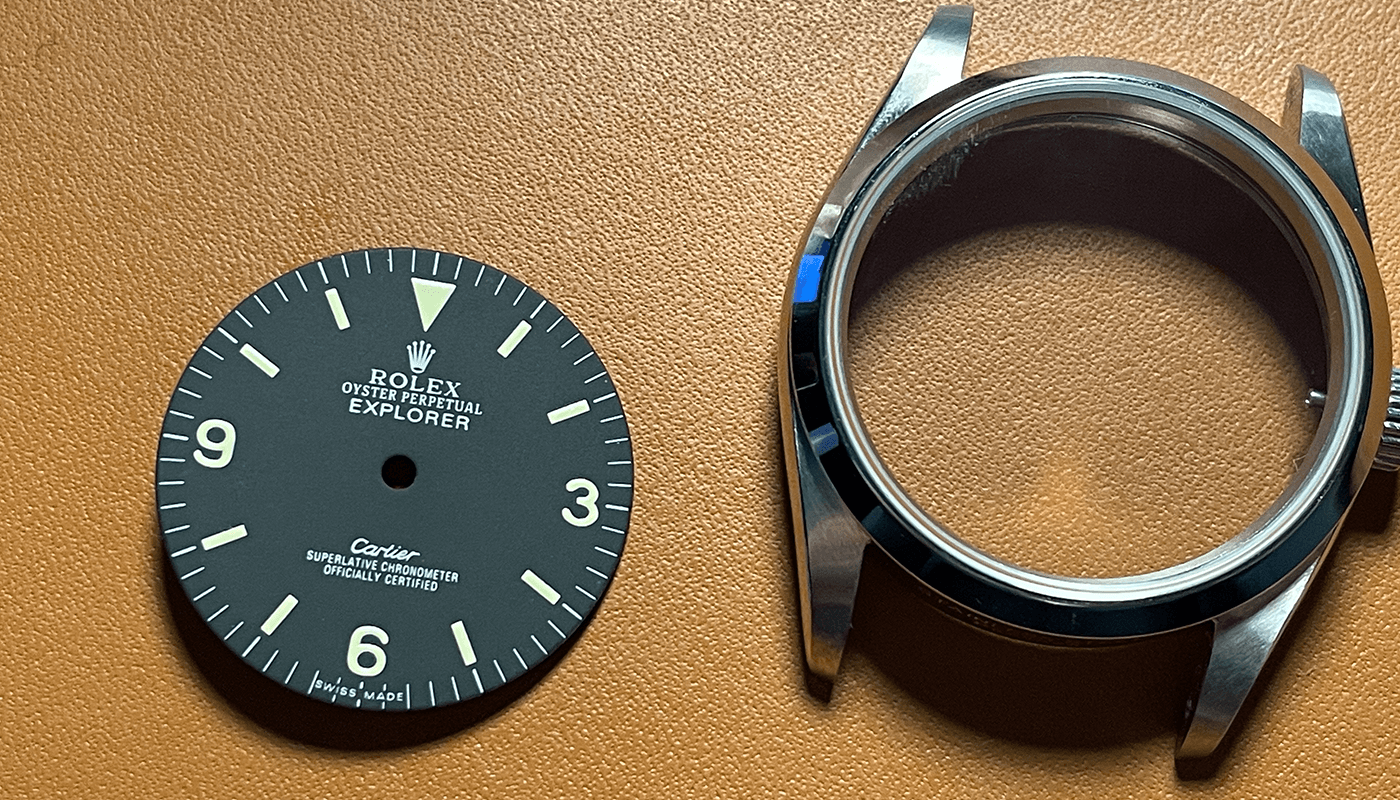
For the case this is an explorer case from Raffles that allows a 28-29mm dial and takes the 8215 movement. This is a vintage case with a smooth bezel and super nice glass.
Get CaseI sourced explorer / submariner style hands on eBay i found stainless steel ones with a yellow lume this gives them a slight vintage look
Get HandsFor the strap I wanted a stylish vintage feel so i purchased a sandy coloured suede strap. I sourced this from eBay also
Get the StrapThe Build
This built took me about 3 weeks to source all the parts from around the world and get them shipped to me. Once they arrived it took me about 2 to 3 hours to assembly the the watch. Before touching parts put some vinyl gloves on similar to stop direct contact with bits
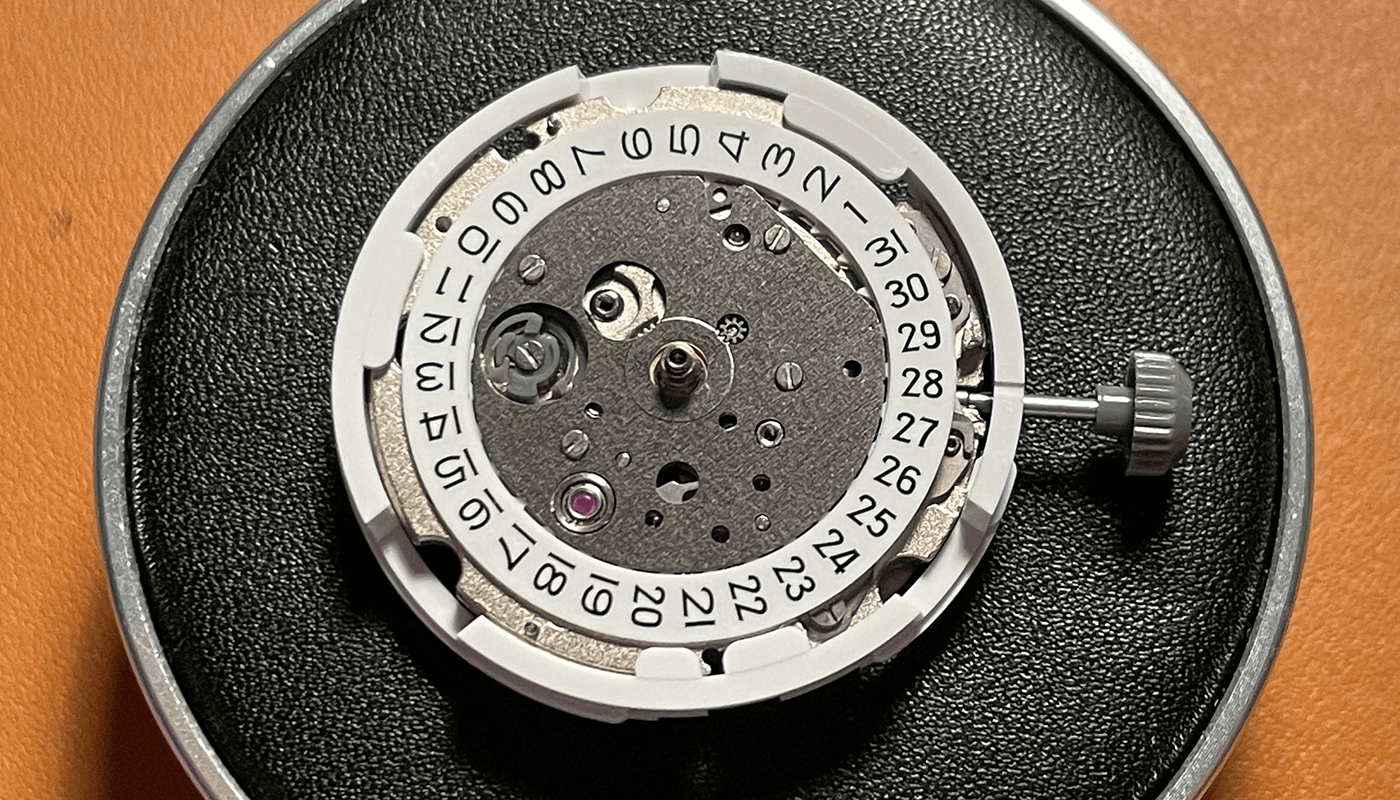
Let's get started, the first thing i have done is the 8215 movement comes with a case holder i am using this instead of the movement ring that comes with the case. The one that comes with te 8215 is of much better quality as also it acts as holder to support the dial. It also fits snug into the watch case.
To put the holder than comes with, align the slight cut out where the stem goes into the movement this will help align the holder then pop / push onto the movement it will feel very secure. We are leaving the date behind the dial on this movement.
Preparing the Dial
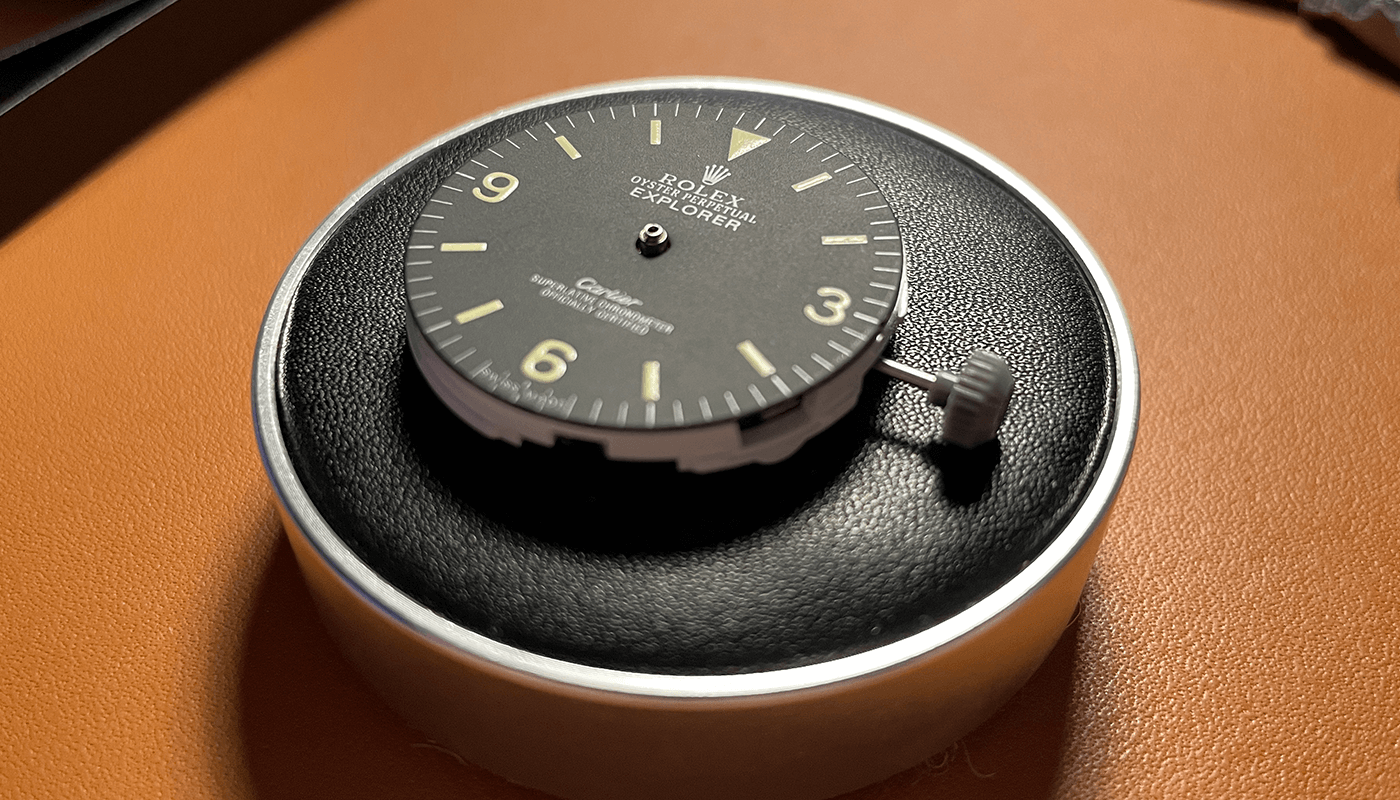
The dial i purchased comes with the correct feet for the 2813 movement, this is the same dial feet position as the 8215 so you can align this onto the movement and slide the feet into the small holes. You can use the indent near 3 to align with the stem

Now use the screws that come with movement and secure the dial to the movement. Tighten until it holds the dial in place
Hands onto Movement

Now we are ready to start putting the hands onto the movement. As the date function is not visible we are less worried about the position and checking its when the date flicks. We can go ahead and put the hour hand onto the movement. I use blue tac to hold the end of the hand and move over the pinon and push down with hand press tools. You can pull the stem out 3rd and last position and check the hour hand moves,
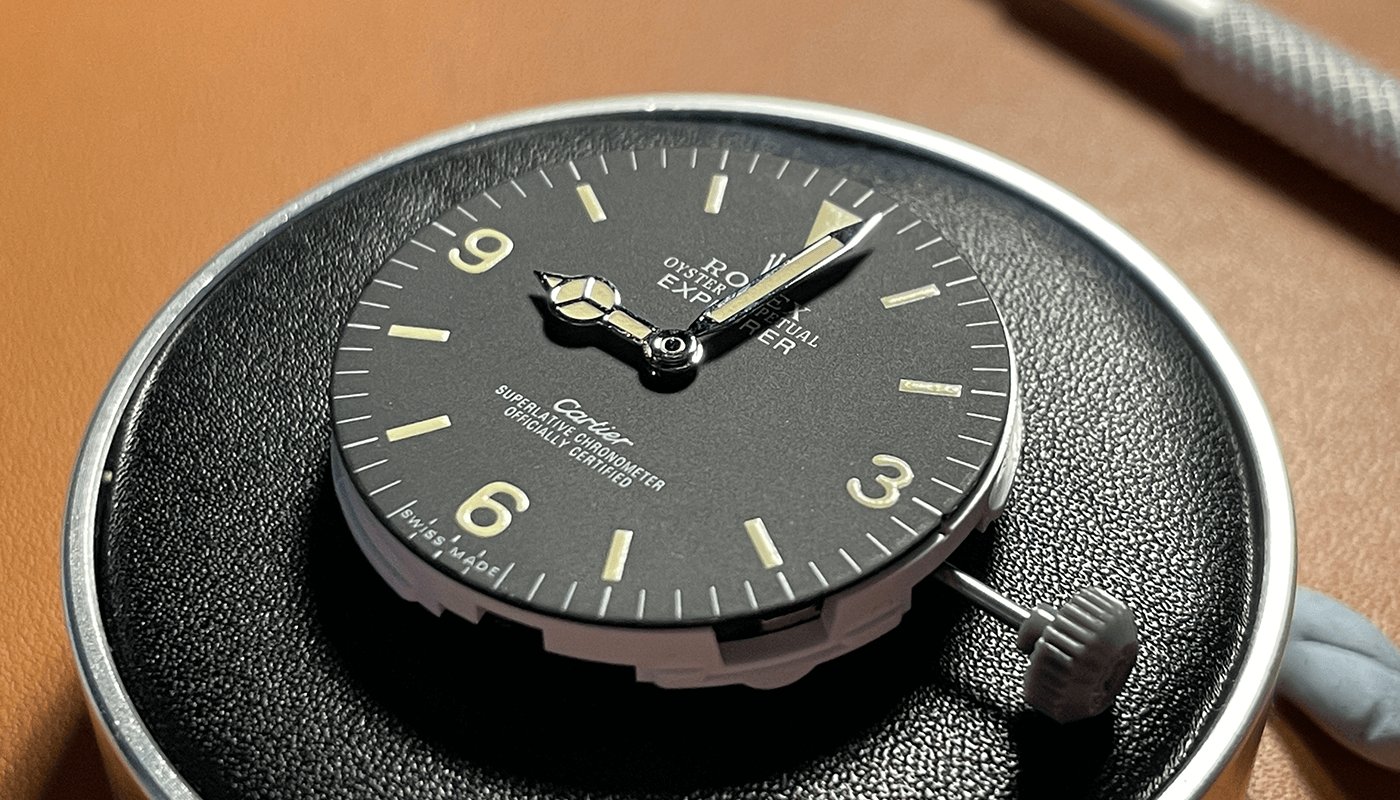
For the minute we will need to align this with the hour hand at 12 so the are added to the build in the same position. This will ensure when minute moves round the hour hand will move at the correct increments. Its easier to use the mag glasses for the minute hand and second hand. You will want to place the second hand onto the pinon. Once the second hand has been placed and secured by hand press tools it will start to sweep. - I have a lot more detail on hand placement on build guide for the 16234 here
Removing the Stem on 8215 movement

Now all the hands are on the movement. **Important Step** Before removing the stem make sure the stem is in the winding posting. We will need to remove the stem to get it into the case. You can push on the little button which has an arrow pointing to it with a small screwdriver or tweezers. Push carefully and pull out the stem out of the case. This stem is a temporary one as the 8215 is supplied with another stem
Movement into the Case
You can now place the case over the dial and flip the watch over to see your vintage watch for the first time
Resizing the Stem and Crown
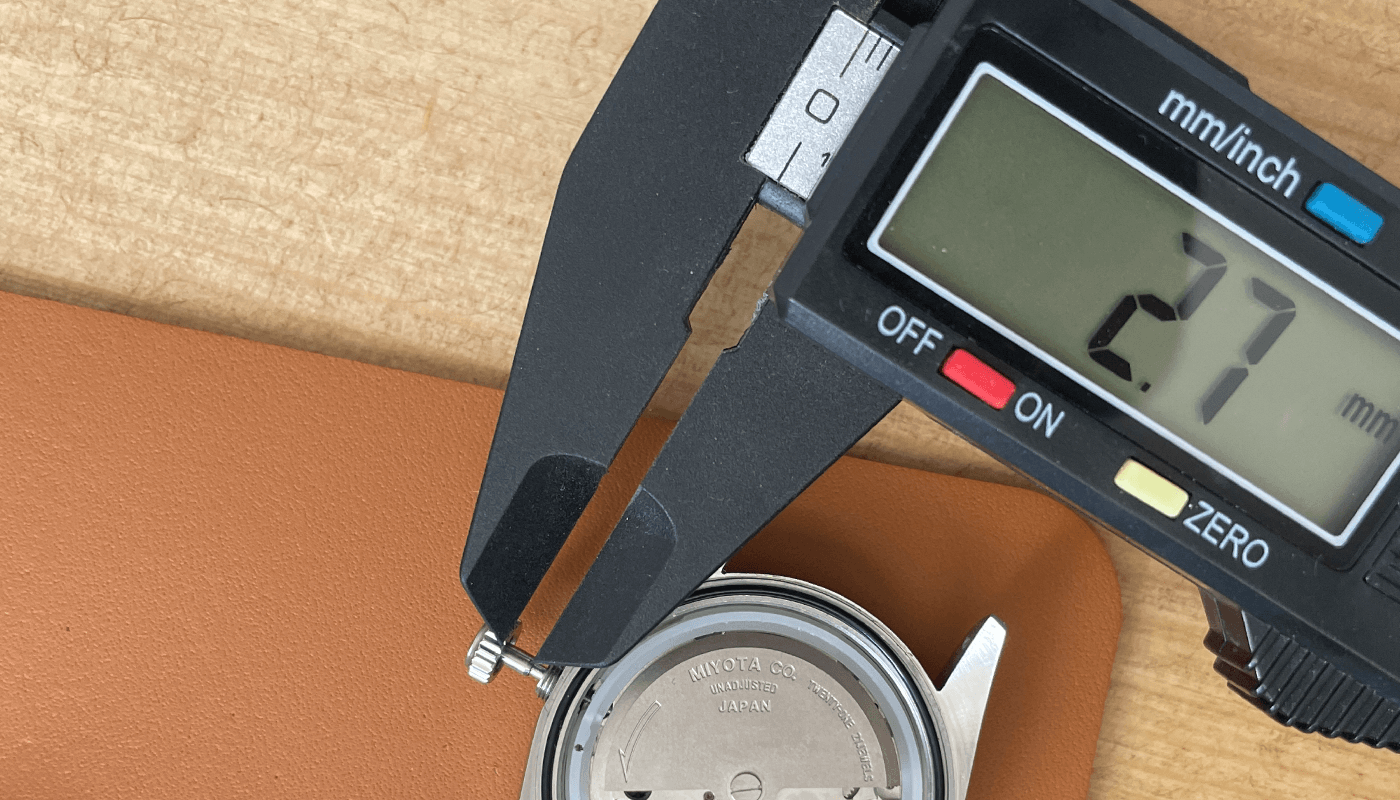
We will now need to sort the new stem and apply our crown. First screw the crown on top the new stem and place the stem back into the movement and push into the winding position, we will need to measure the distance between the case and the crown. Write down the size
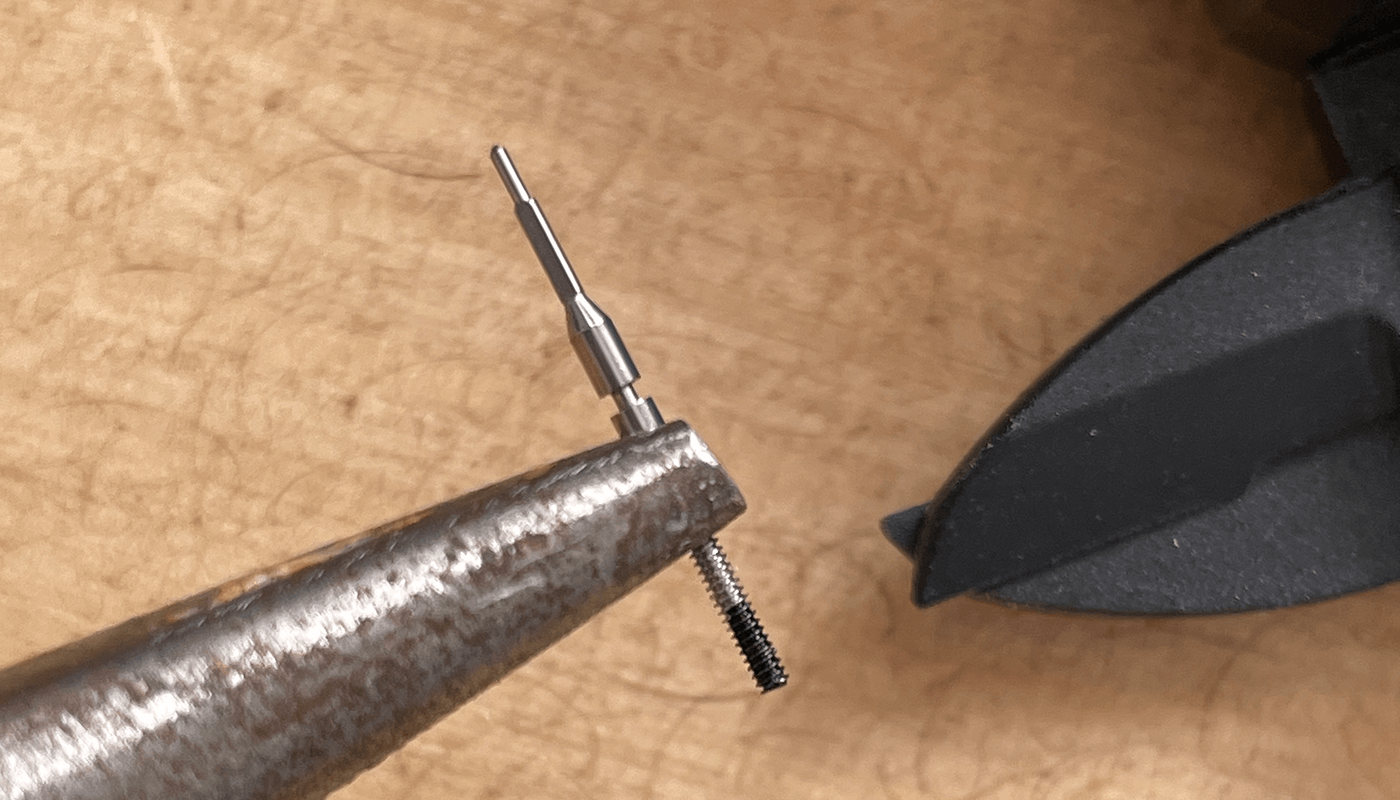
Now you can mark the amount to remove from the step. I use a black marker pen to mark the amount i am going to remove. Make sure you measure more than once and always over cut rather than cutting too short. When ready make the cut and snip off using some clippers.
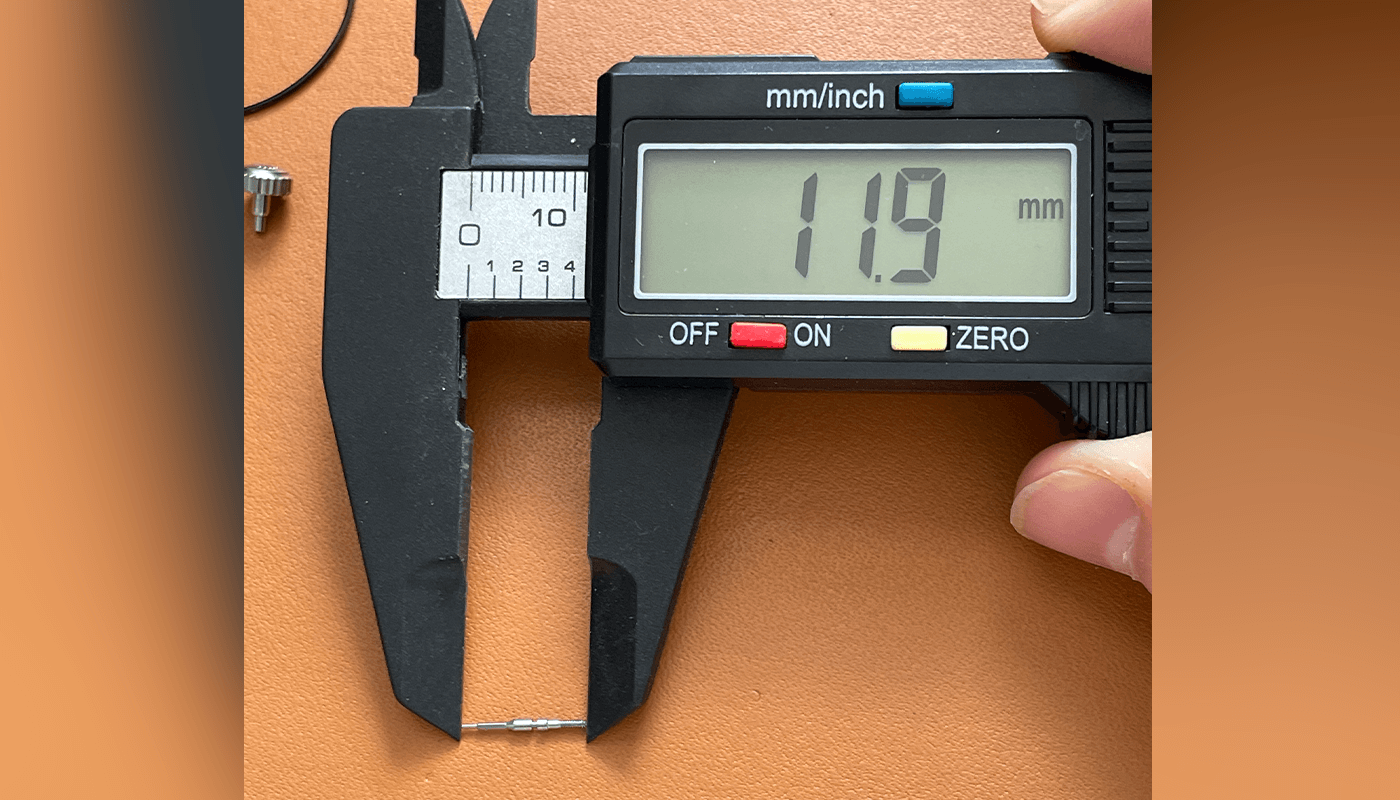
The total length before adding the crown is 11.9mm for the 8215 movement and the case in the sourced parts. You can now add the crown again and check in the movement. Make sure you can push down and secure the crown to the case.
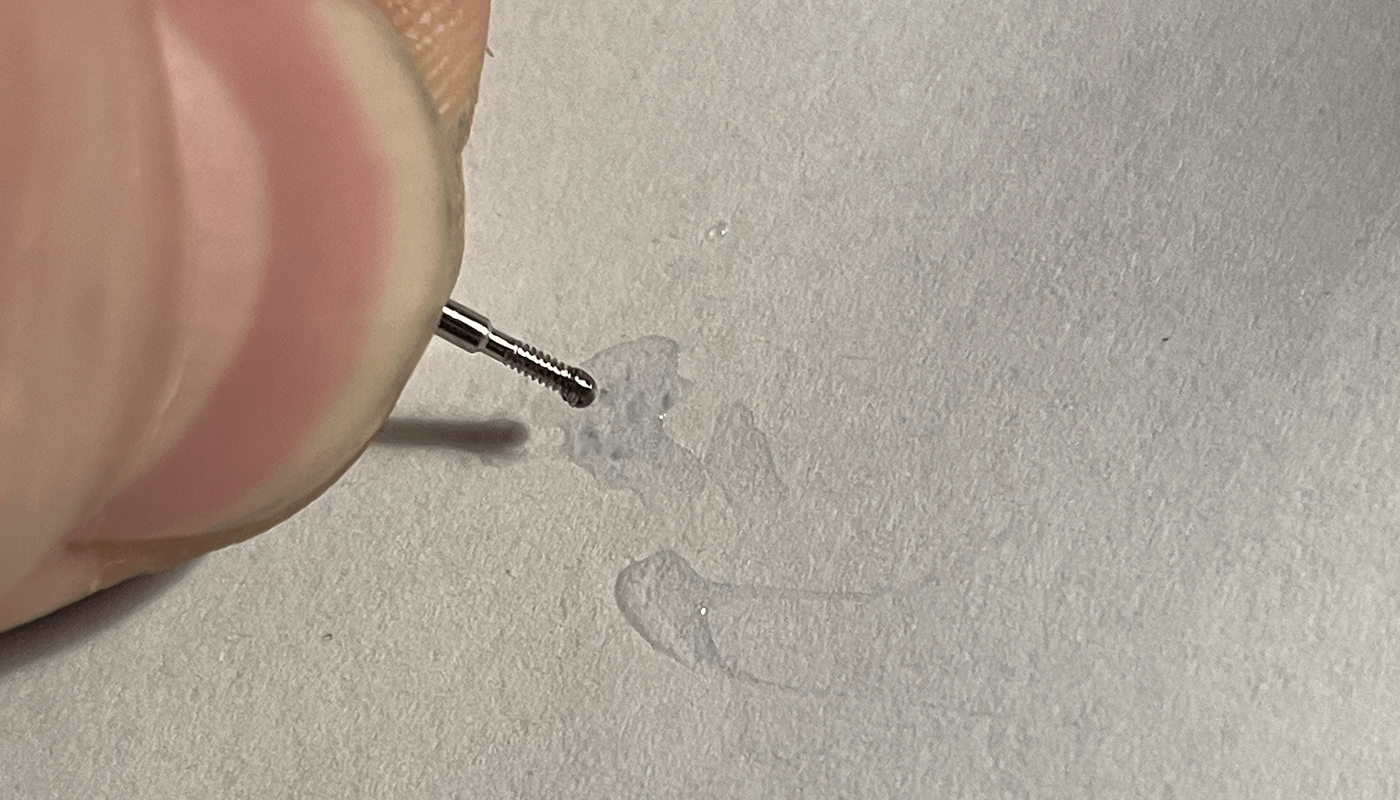
When you are happy we will now need to glue the crown on to the stem. Put a small amount of GS hypo cement glue onto some paper and dip the end of the stem into the glue.
Get Glue
Hold the stem with pliers and secure the the crown until is tight. Sit aside for 15 mins until it is dry and once ready you can put back into the case and it is now built
Sealing into the Case
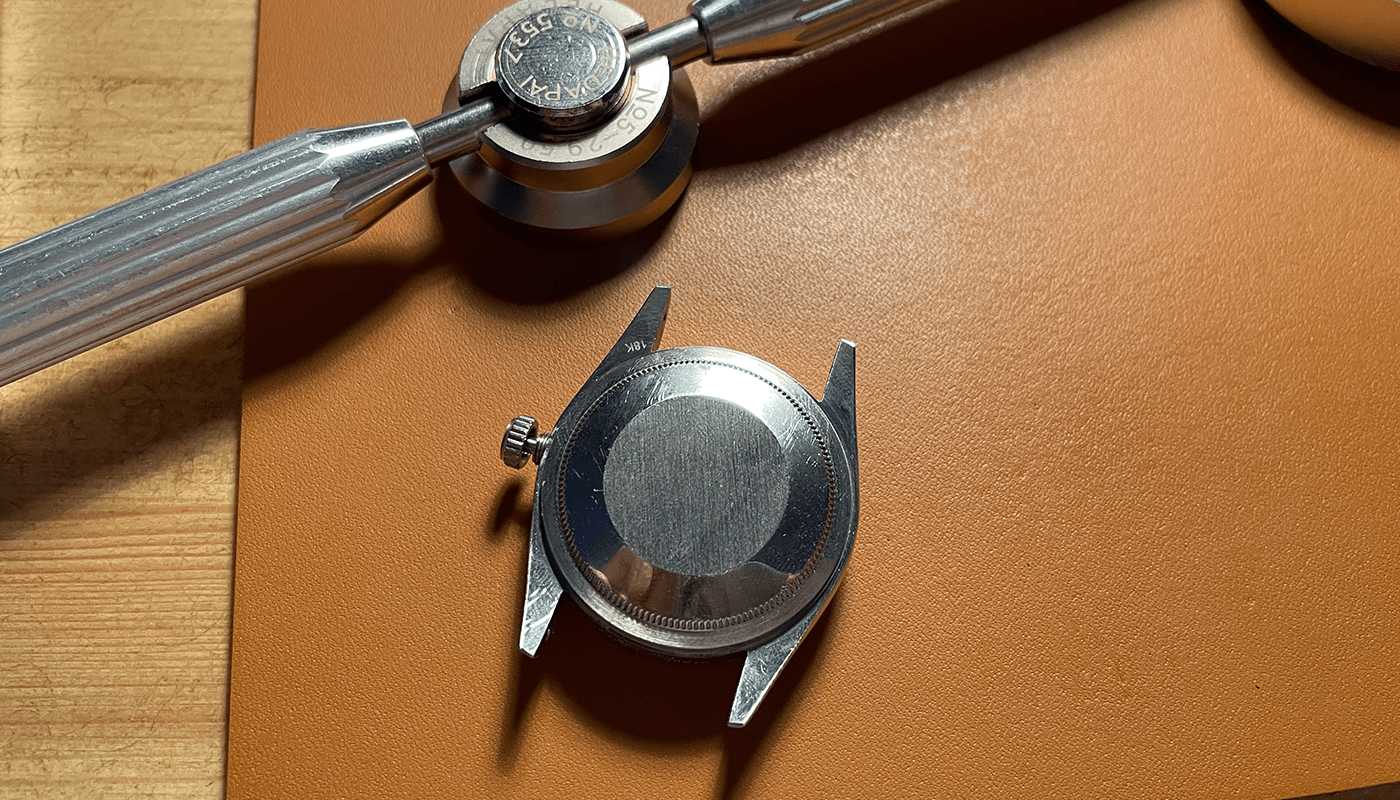
Put the gasket ring onto the back of the movement and then you can tighten the case back with your fingers until tight and then finish with the case back opener tool
Get Watch Case Back Opener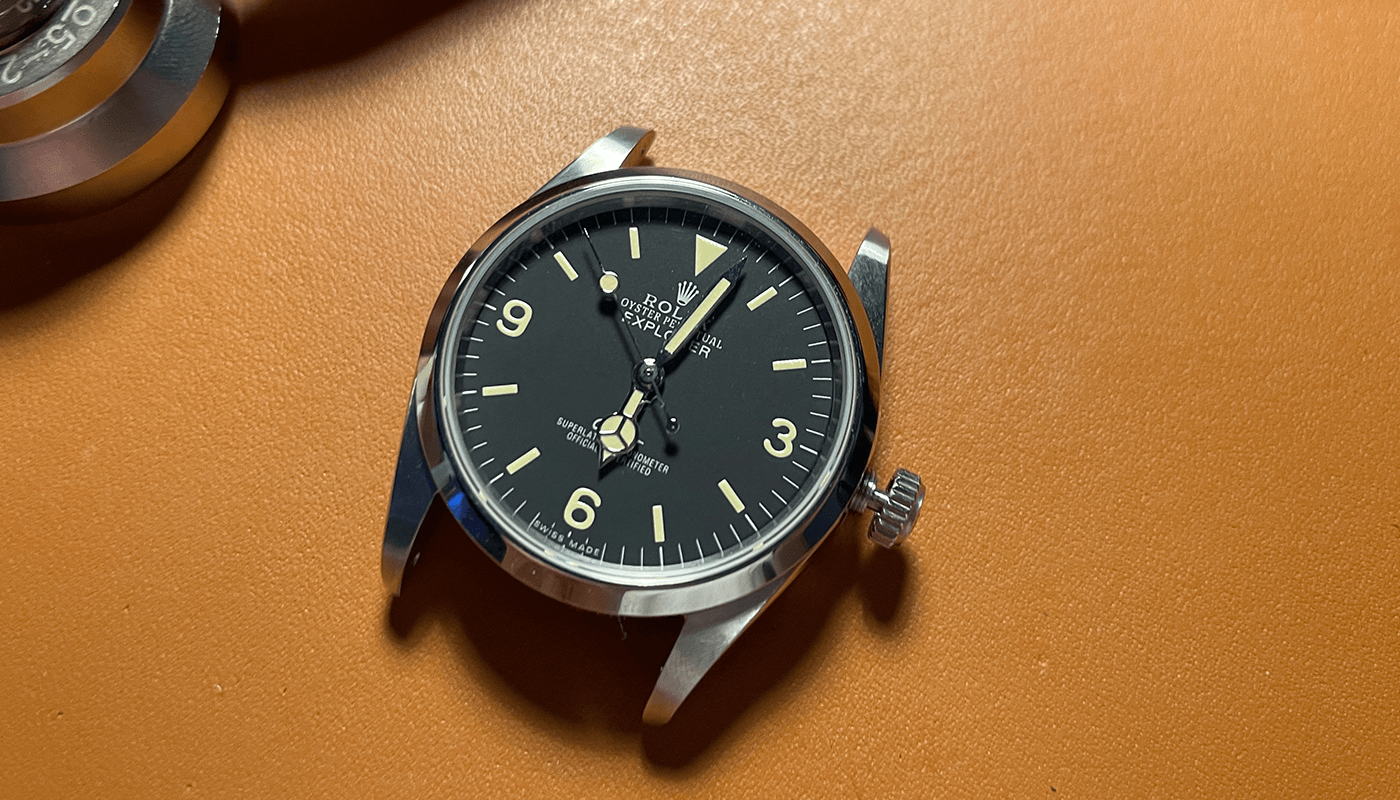
Now pick up your watch - You are finished! Well Done
Strap and Build Photos